Before you can schedule classes, you need to set up the resources: Classrooms (training locations or rooms) and Presenters (instructors/facilitators). Without classrooms and presenters in the system, you cannot create classes. This guide explains how to add and manage classrooms and presenters for your client(s).
The access required to manage classrooms and presenters:
Locations Admin - Create and manage classrooms
Presenters Admin - Add and manage presenters
Why Set These Up First?
Classrooms and presenters are prerequisites for creating classes. They must be set up before you can schedule individual training sessions. These resources are filtered by client, so each organizational unit manages their own classrooms and presenters:
Classroom – Location where the class is held
Presenter – Instructor and/or facilitator(s) who will teach the class
Quick Setup
If you're setting up TMaRS for the first time for your client(s):
Add all classrooms (conference rooms, labs, online)
Add all presenters and facilitators
Now, you are ready to start scheduling classes
This typically takes 10-15 minutes for initial setup.
Managing Classrooms
Classrooms (room) are the physical or virtual locations where training takes place. Each room has a default capacity that is used when scheduling classes.
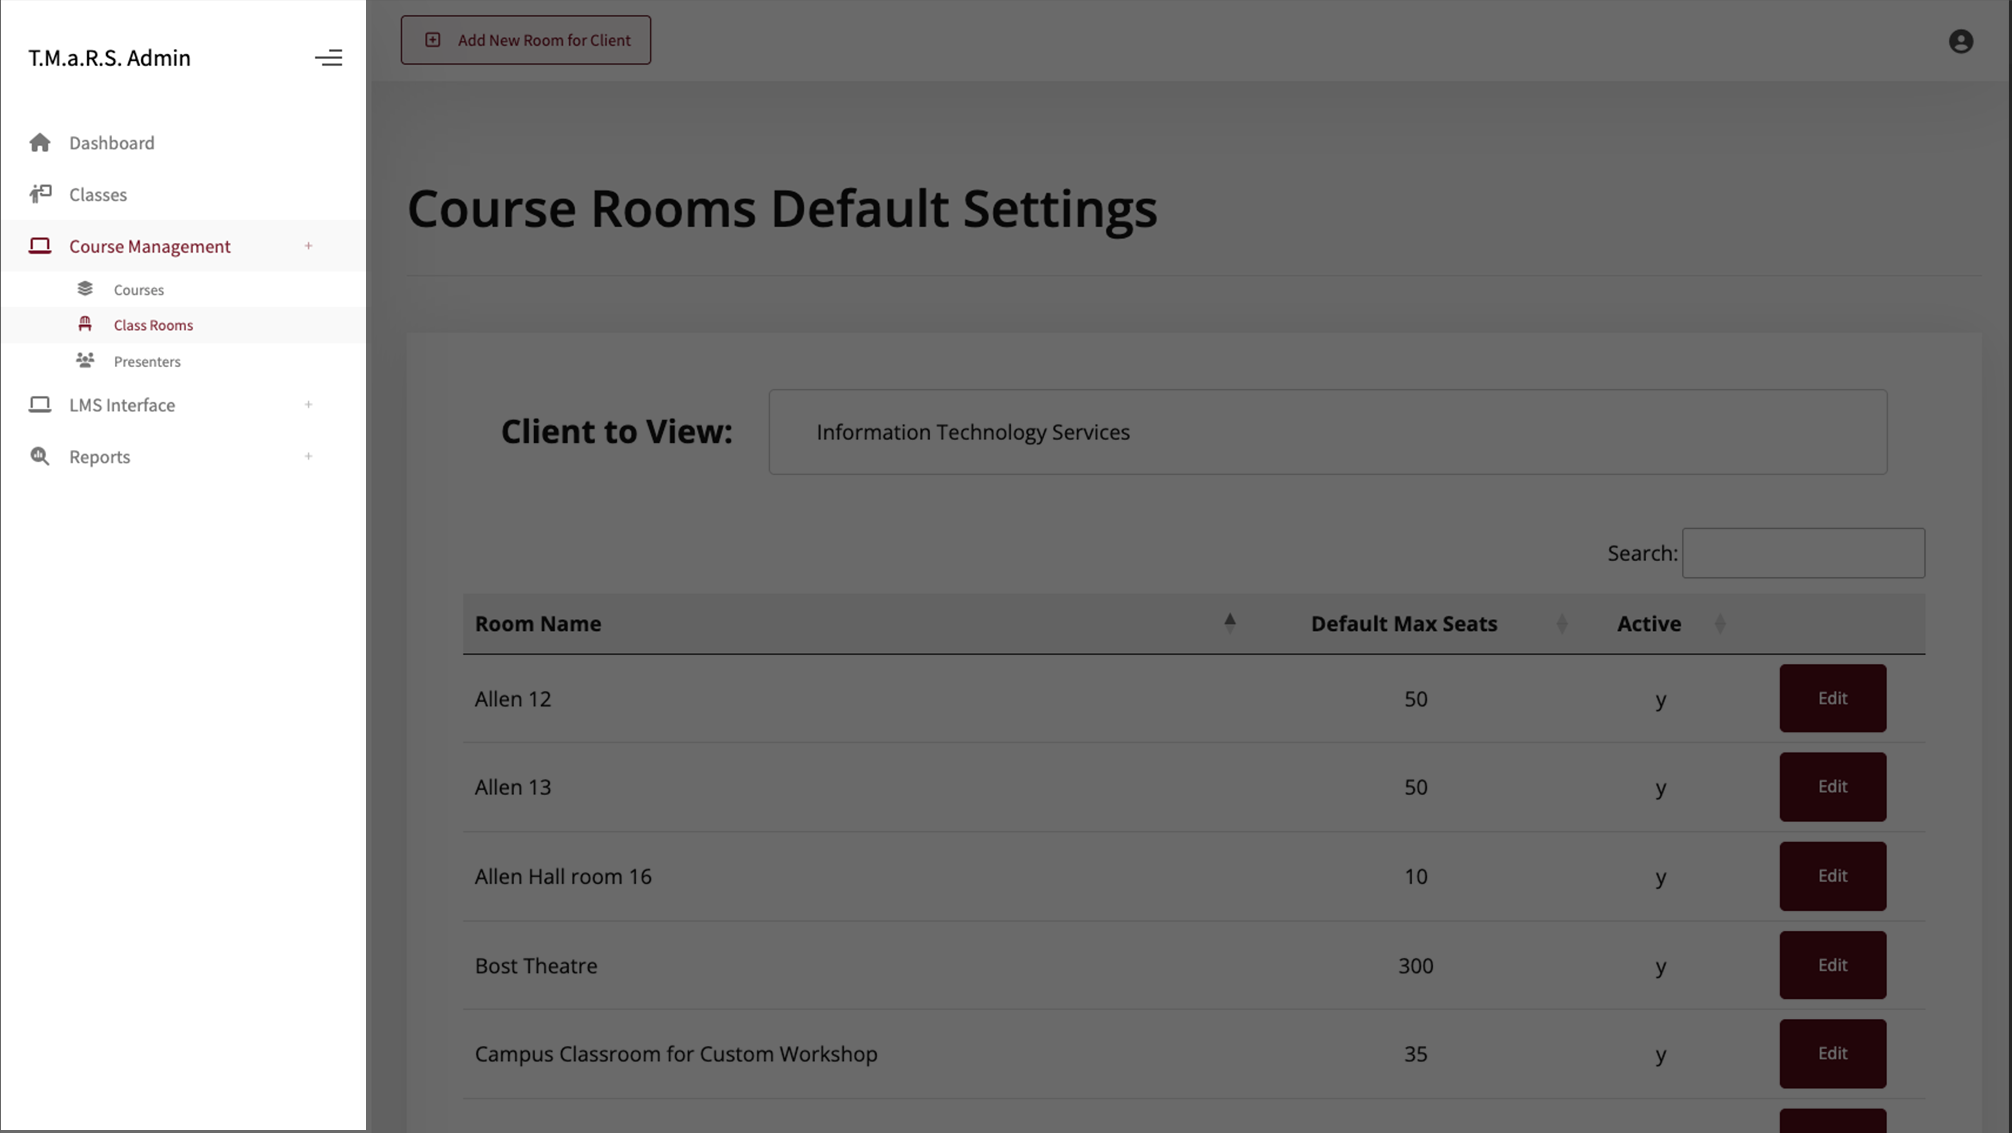
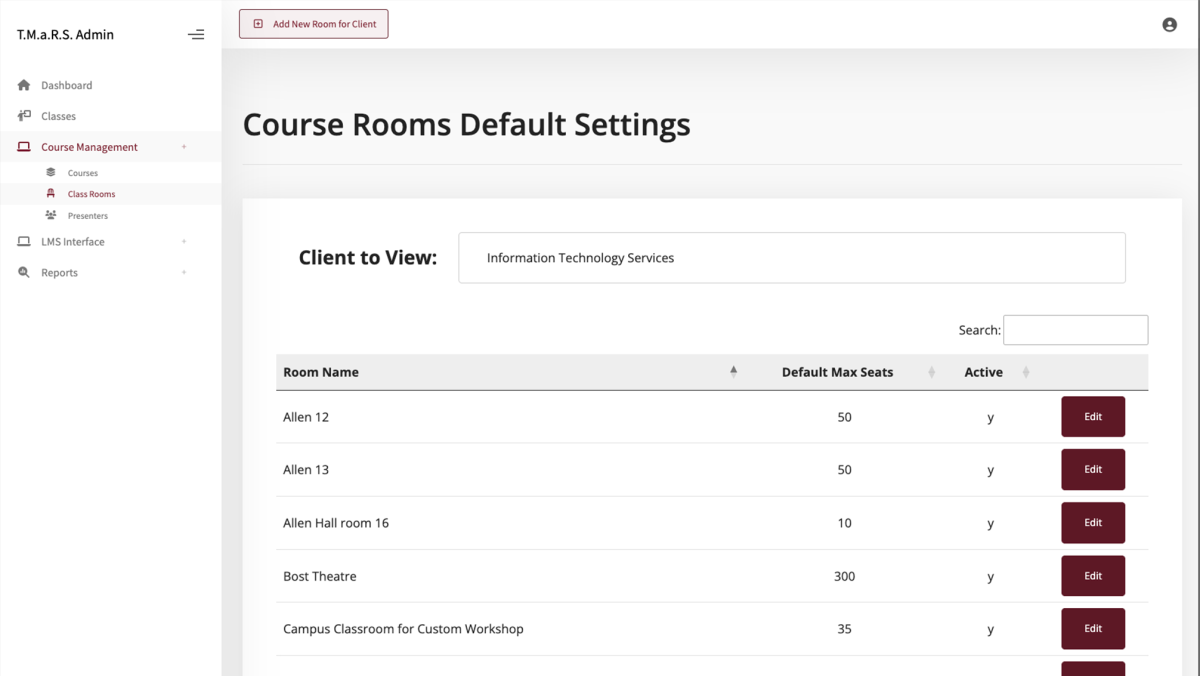
Viewing All Rooms
To view all rooms for your client:
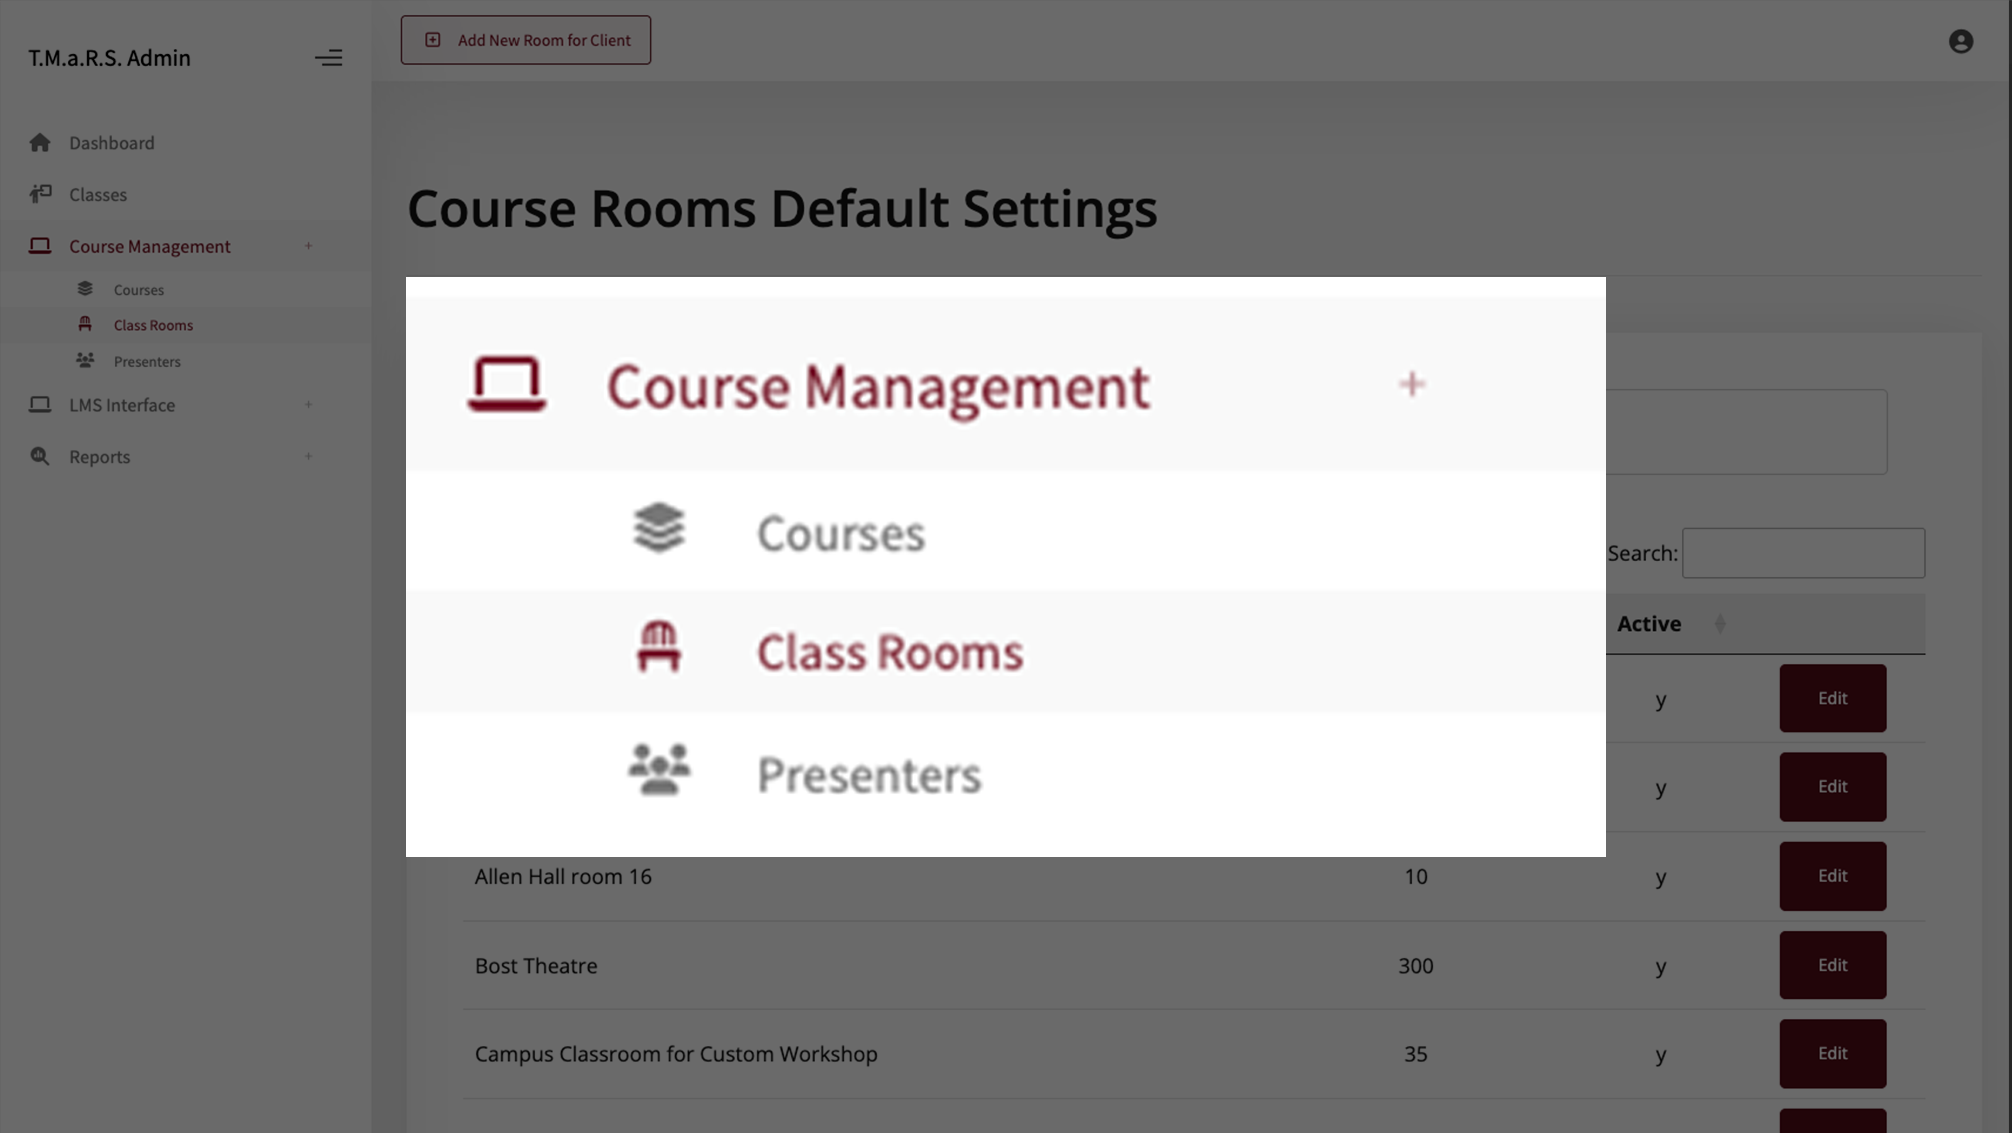
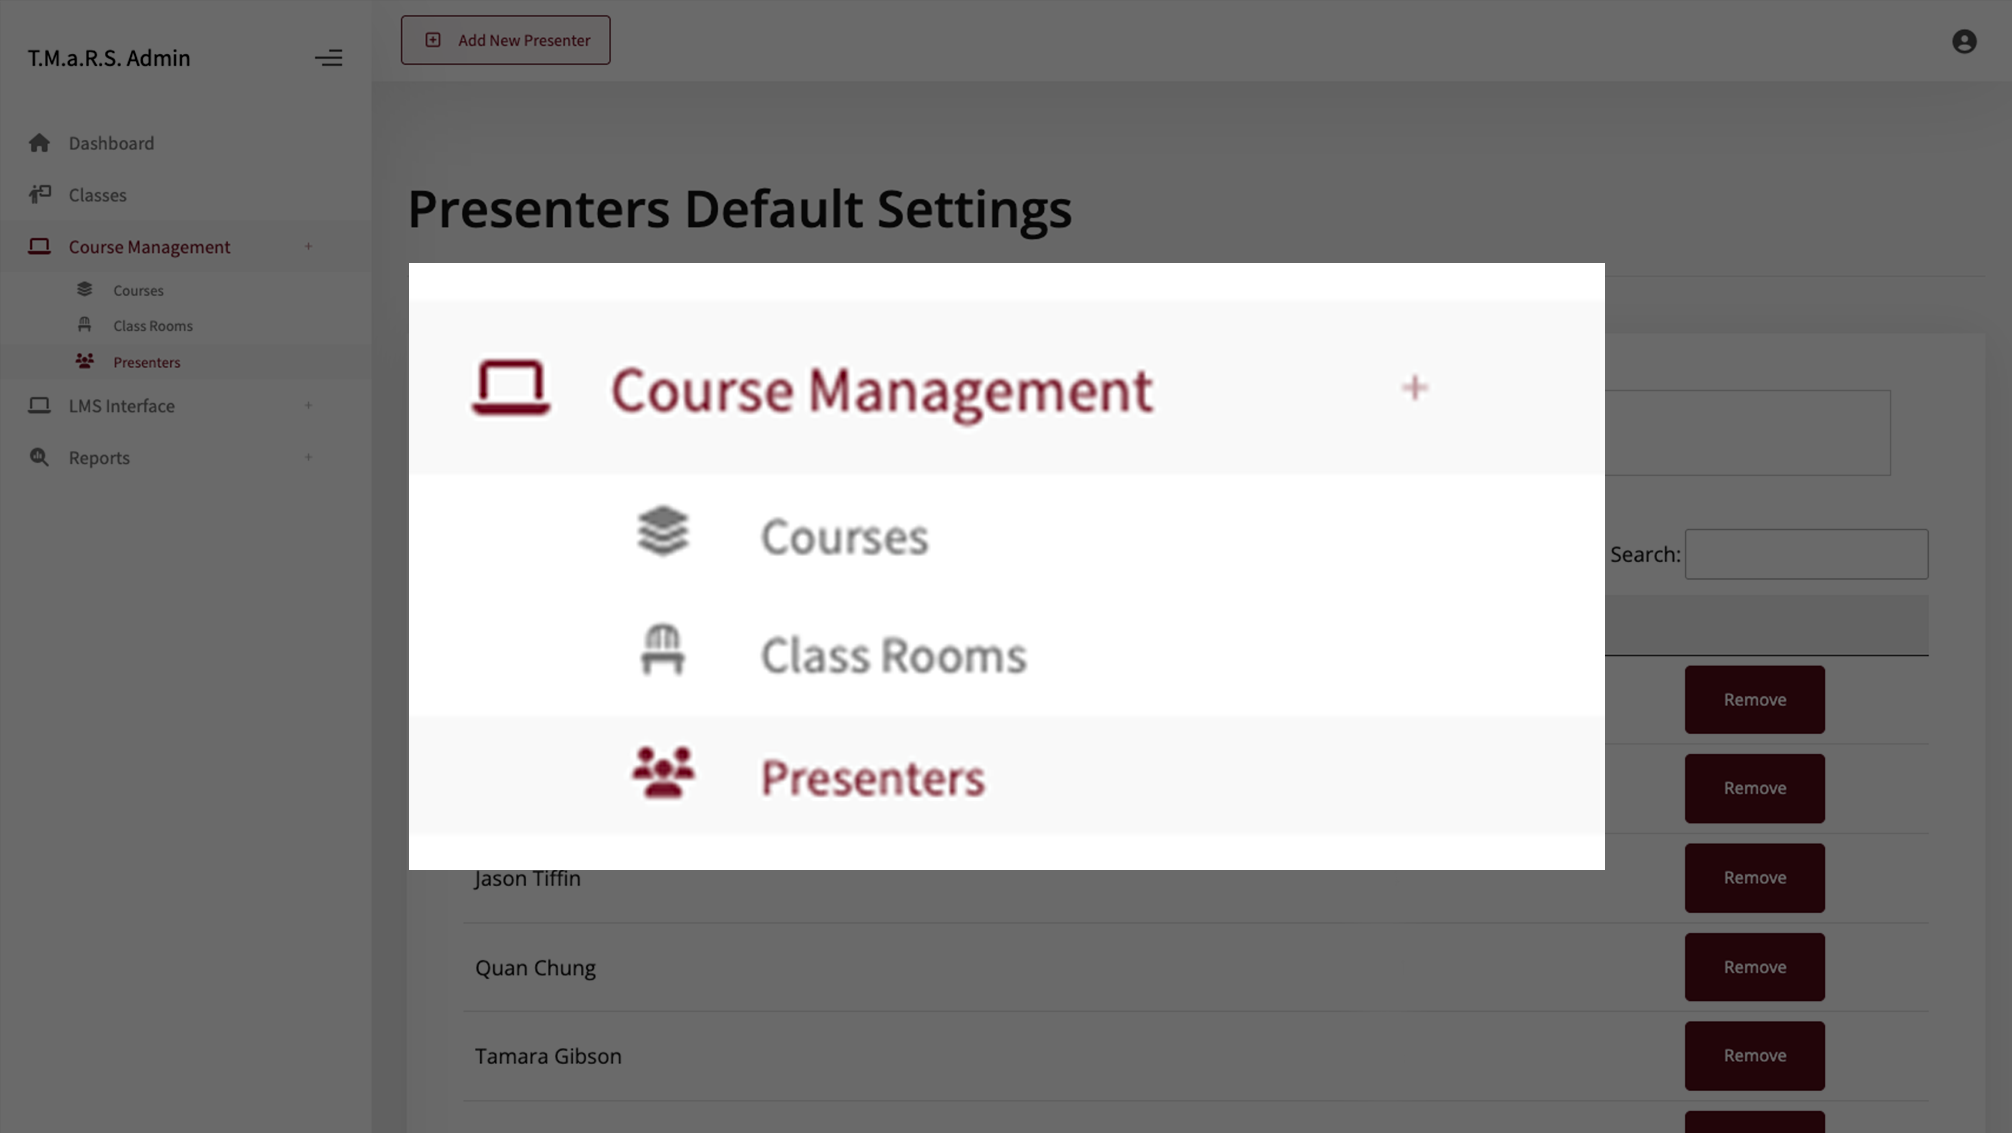
Navigate to Course Management → Classrooms.
Select your client from the "Client to View" dropdown.
A table will display with a listing of all rooms for that client.
Classrooms Overview
he Classrooms Default Settings page displays all training locations for your selected client.
The table displays Room Name, Default Max Seats (capacity), Active status, and an Edit button for each room.
Use the Search box at the top right to quickly find specific rooms.
Click column headers to sort the list.
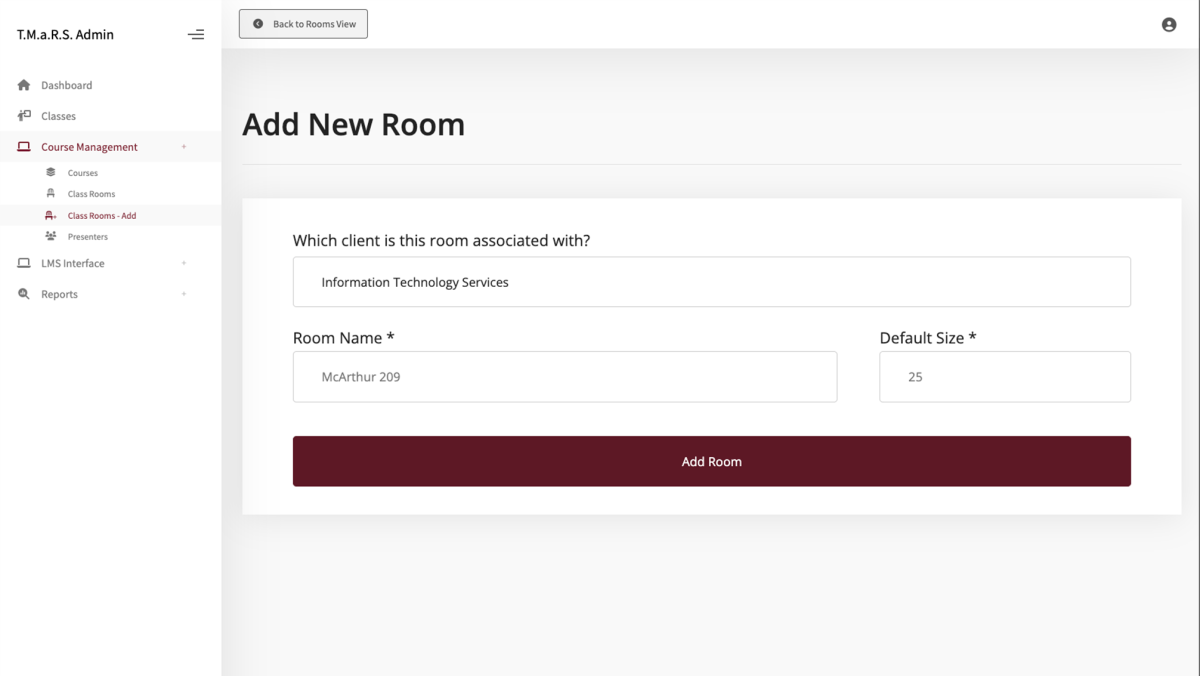
Adding a New Classroom
To create a new room:
Navigate to Course Management → Classrooms.
Click the Add New Room for Client button at the top.
The form has three simple fields and it only takes a moment to add a room:
Which client is this room associated with?
If needed, select your client from the dropdown.
Room Name*
Default Size*
Click the Add Room button to save.
The system will display a Successfully Added message upon completion.
Add another room or click the Back to Rooms View button to return to the Course Rooms Default Settings page.
Tip: Create a room called "Online" with a large capacity (e.g., 100) for webinar-based training. Create another called "Hybrid" if you regularly offer sessions that combine in-person and online participation.
Room Fields Explained
Field
Description
Required
Which client is this room associated with?
Select the organizational client that owns this room. Only people with access to this client will see the room when creating classes.
The standard capacity for this room. This becomes the default enrollment limit when creating classes in this location.
Can be overridden per class using the "Seat Override" field during Class setup.
Yes
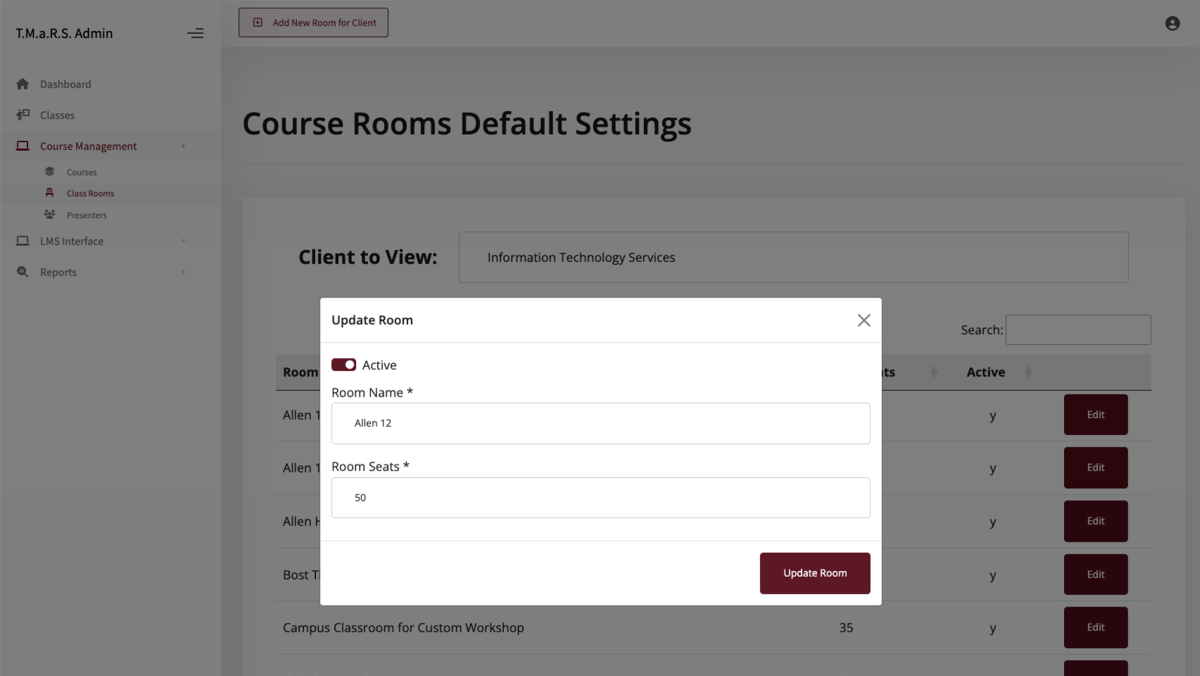
Editing and Deactivating Rooms
Rooms can be edited or updated but not deleted.
To edit an existing room:
Go to Course Management → Classrooms.
Locate the desired room in the Room Name column.
Click the Edit button.
The Update Room modal will appear with the room details.
In the Update Room edit modal, you can:
Active – Toggle the status to make the room active (on) or inactive (off).
Room Name - Update the name of the room.
Room Seats - Change the default capacity of the room – cannot be 0.
Click the Update Room button to save the new changes or click (X) to cancel.
About Deactivating Rooms
Setting a room to Inactive hides it from the location dropdown when creating new classes. However, existing classes scheduled in that room are not affected.
Use this when:
A room is temporarily unavailable (renovations, construction)
A room has been permanently closed
You want to discourage use of a location without deleting it
You cannot delete rooms that have been used for classes - only deactivate them.
Managing Presenters
Presenters are the instructors who teach training sessions. TMaRS pulls presenter information from the university directory, so there is no need to enter names, titles, or contact information manually.
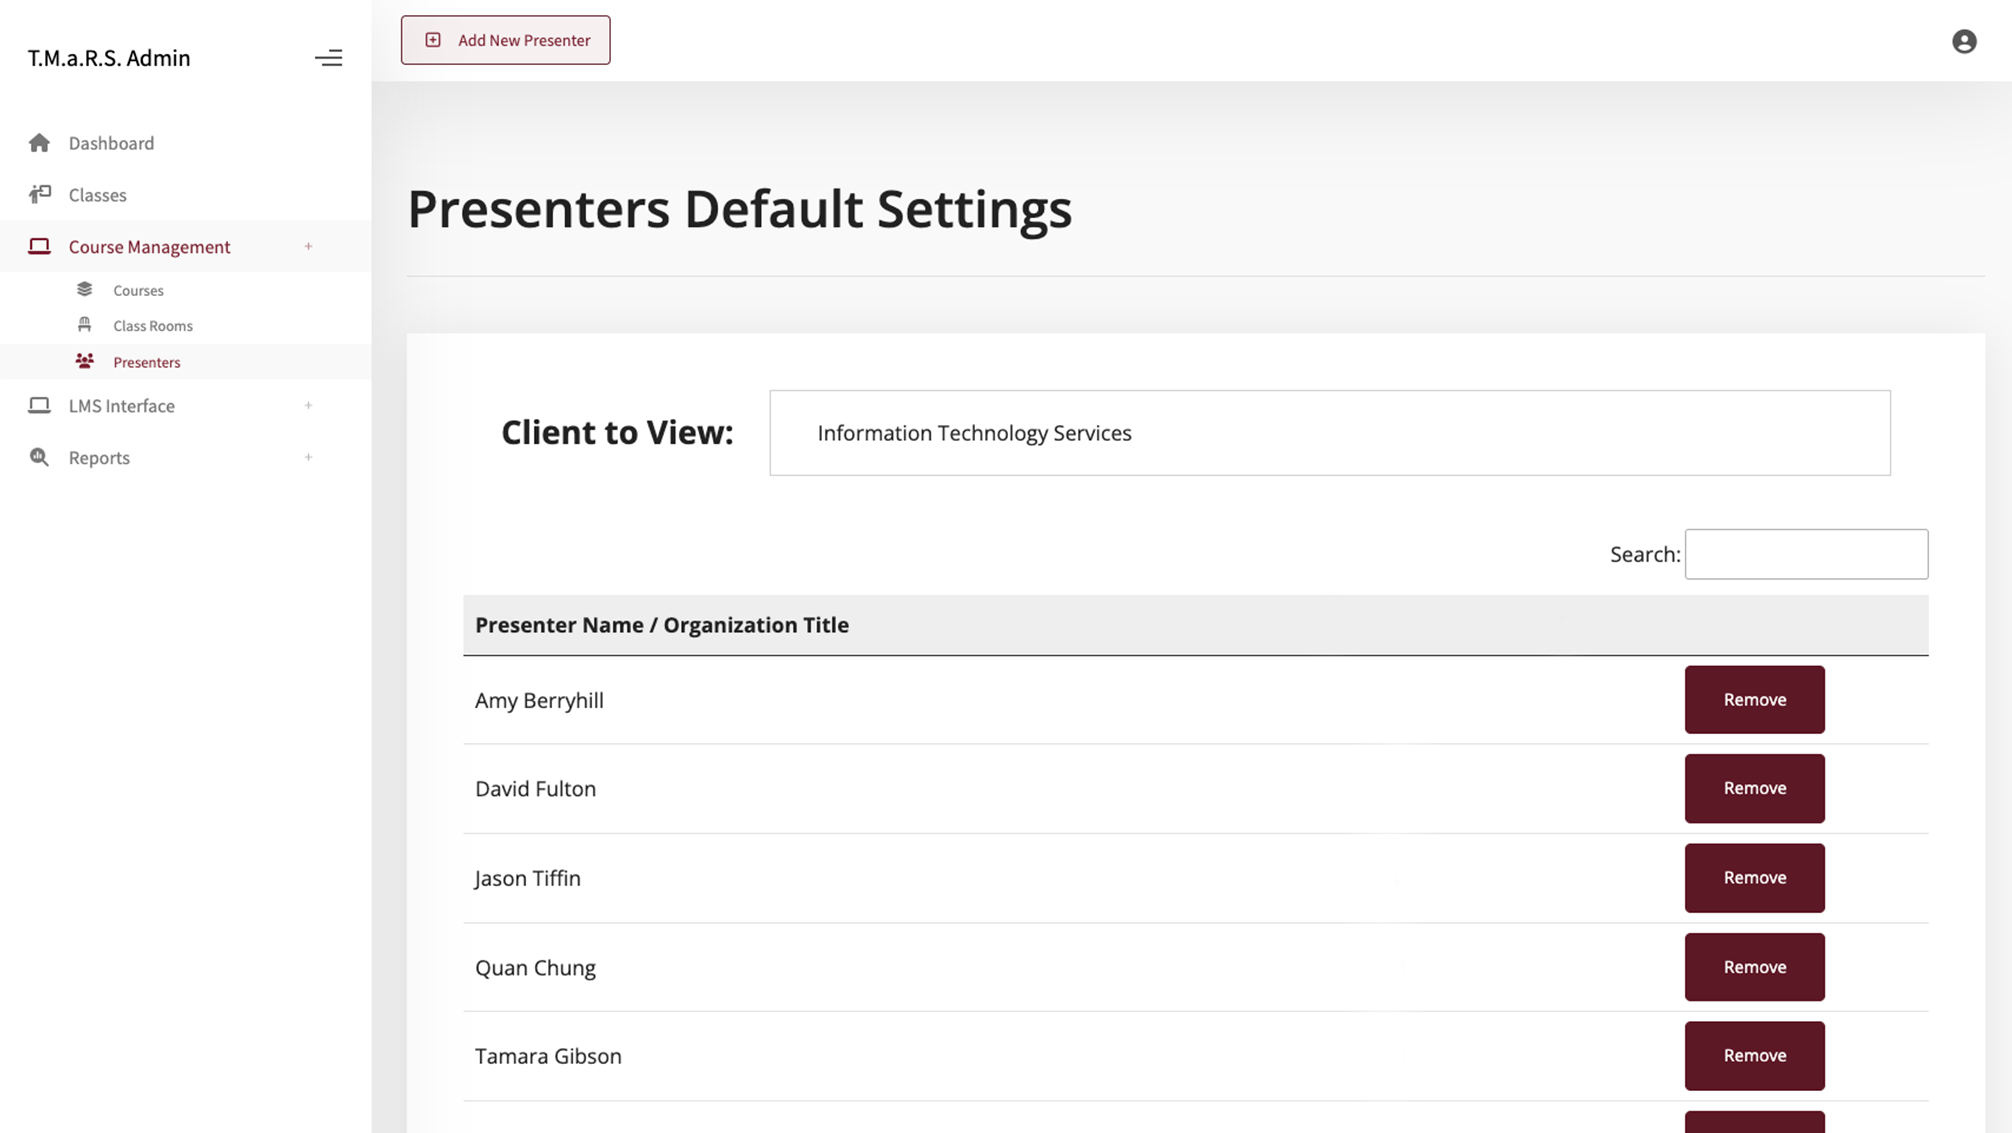
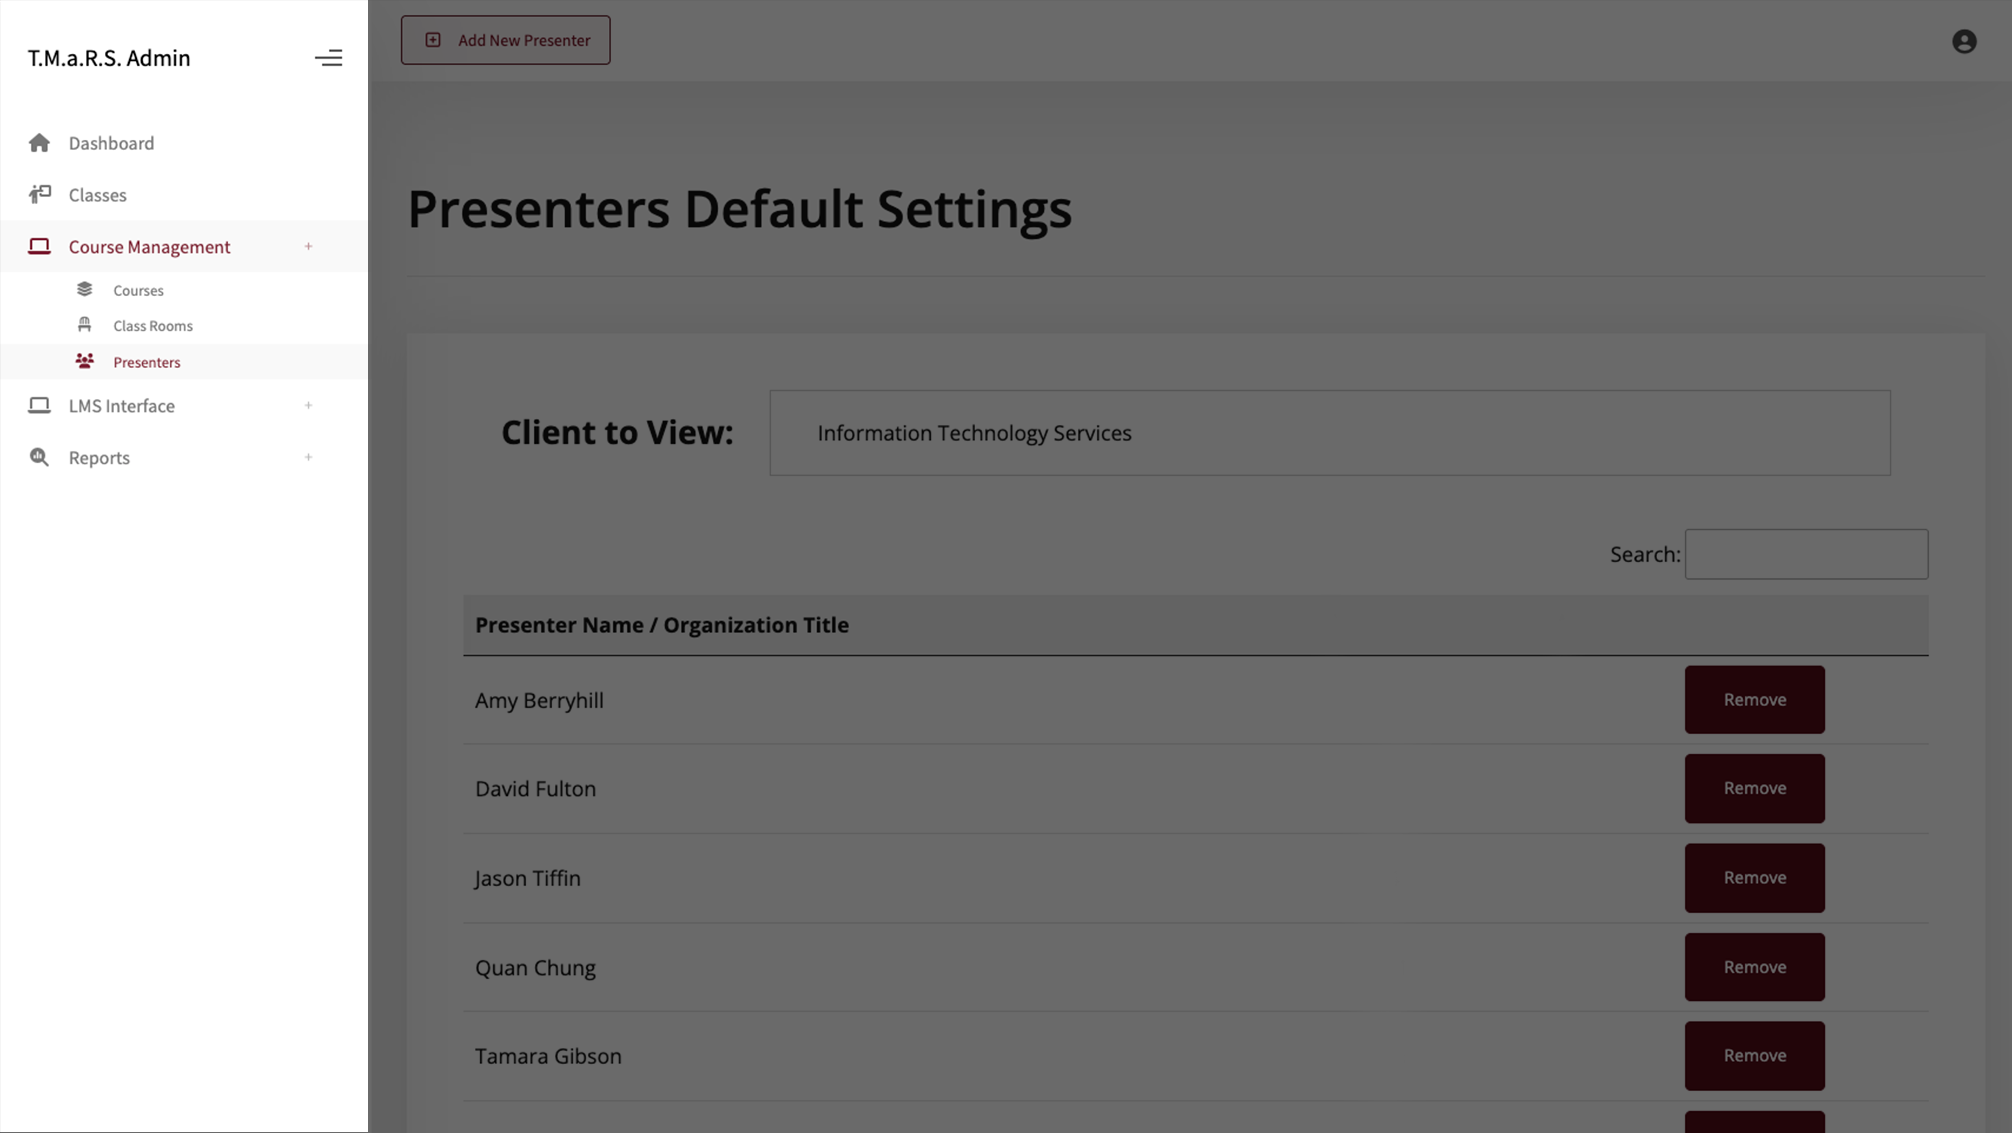
Viewing All Presenters
To view all presenters for your client:
Navigate to Course Management → Presenters.
Select your client from the "Client to View" dropdown.
The table will display all presenters assigned to that client.
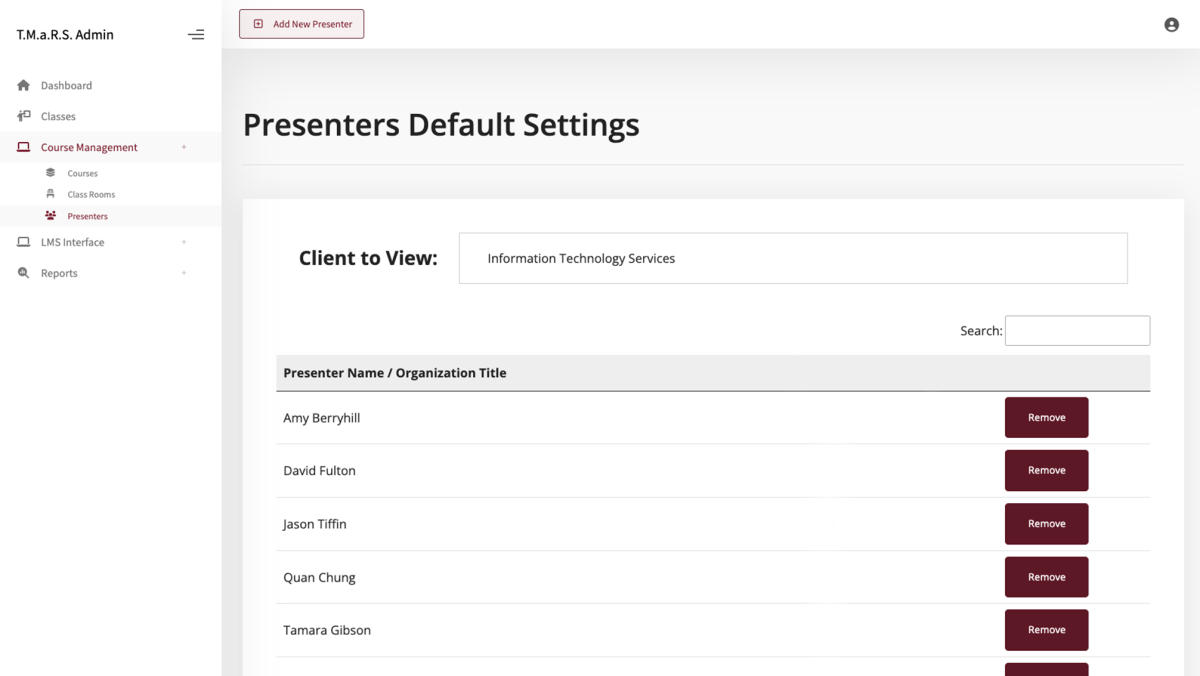
Presenters Overview
The Presenters Default Settings page displays all instructors assigned to your selected client. The table shows Presenter Name, Organization/Title, and NetID, along with a Remove button for each presenter.
Use the Search box to quickly find specific presenters in the list for your client.
Adding a Presenter
MSU employees are added as presenters using their NetID. However, sometimes you may need to add external presenters (instructors) who do not have an MSU NetID (contractors, guest speakers, vendors, etc.). For these cases, see the section, Adding Non-MSU Presenters.
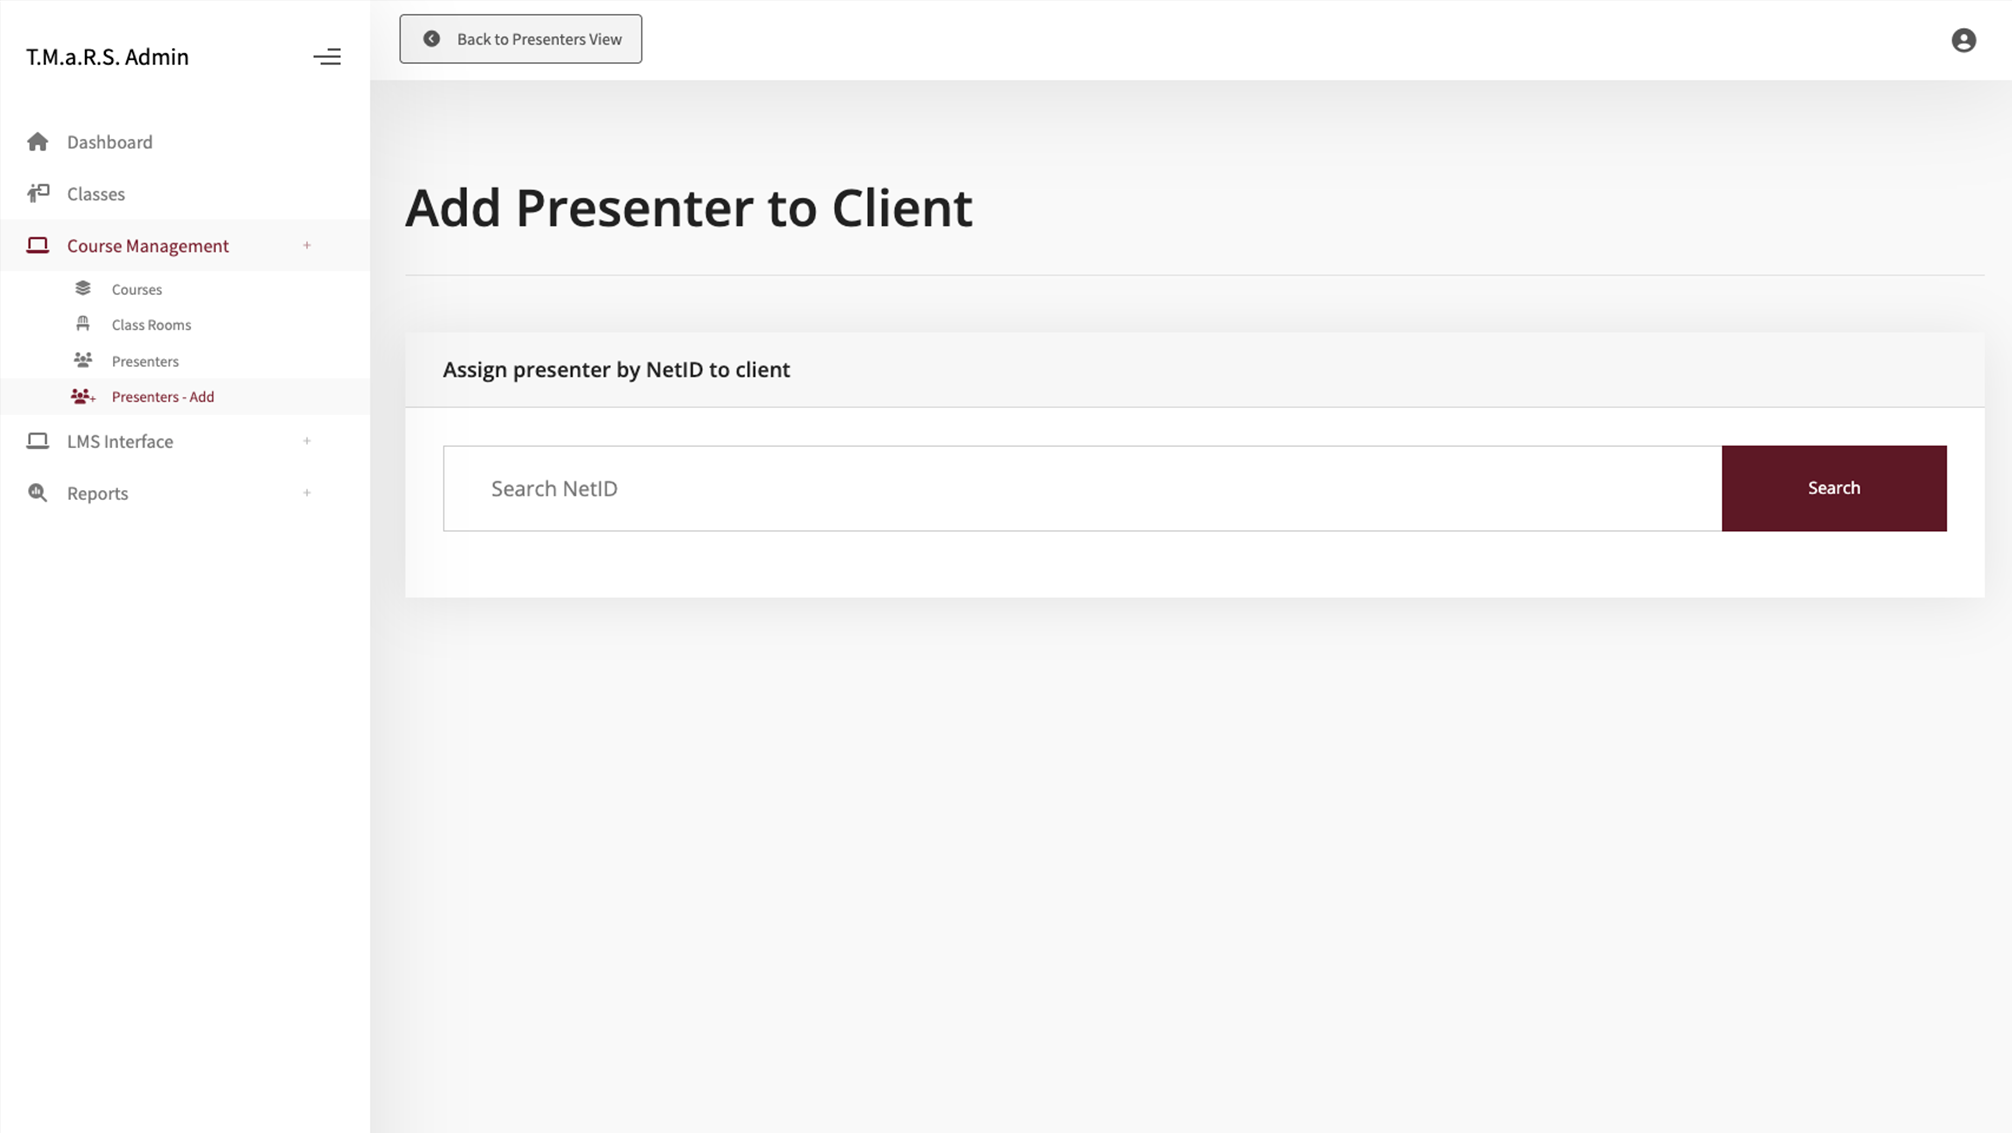
To add a MSU employee as a presenter using the NetID:
Navigate to Course Management → Presenters.
Click the Add New Presenter button at the top of the Presenters Default Settings page.
The Add Presenter to Client default page appears.
Use the "Assign presenter by NetID to client" field to find the new presenter.
Enter the person's NetID in the Search NetID field.
Click Search.
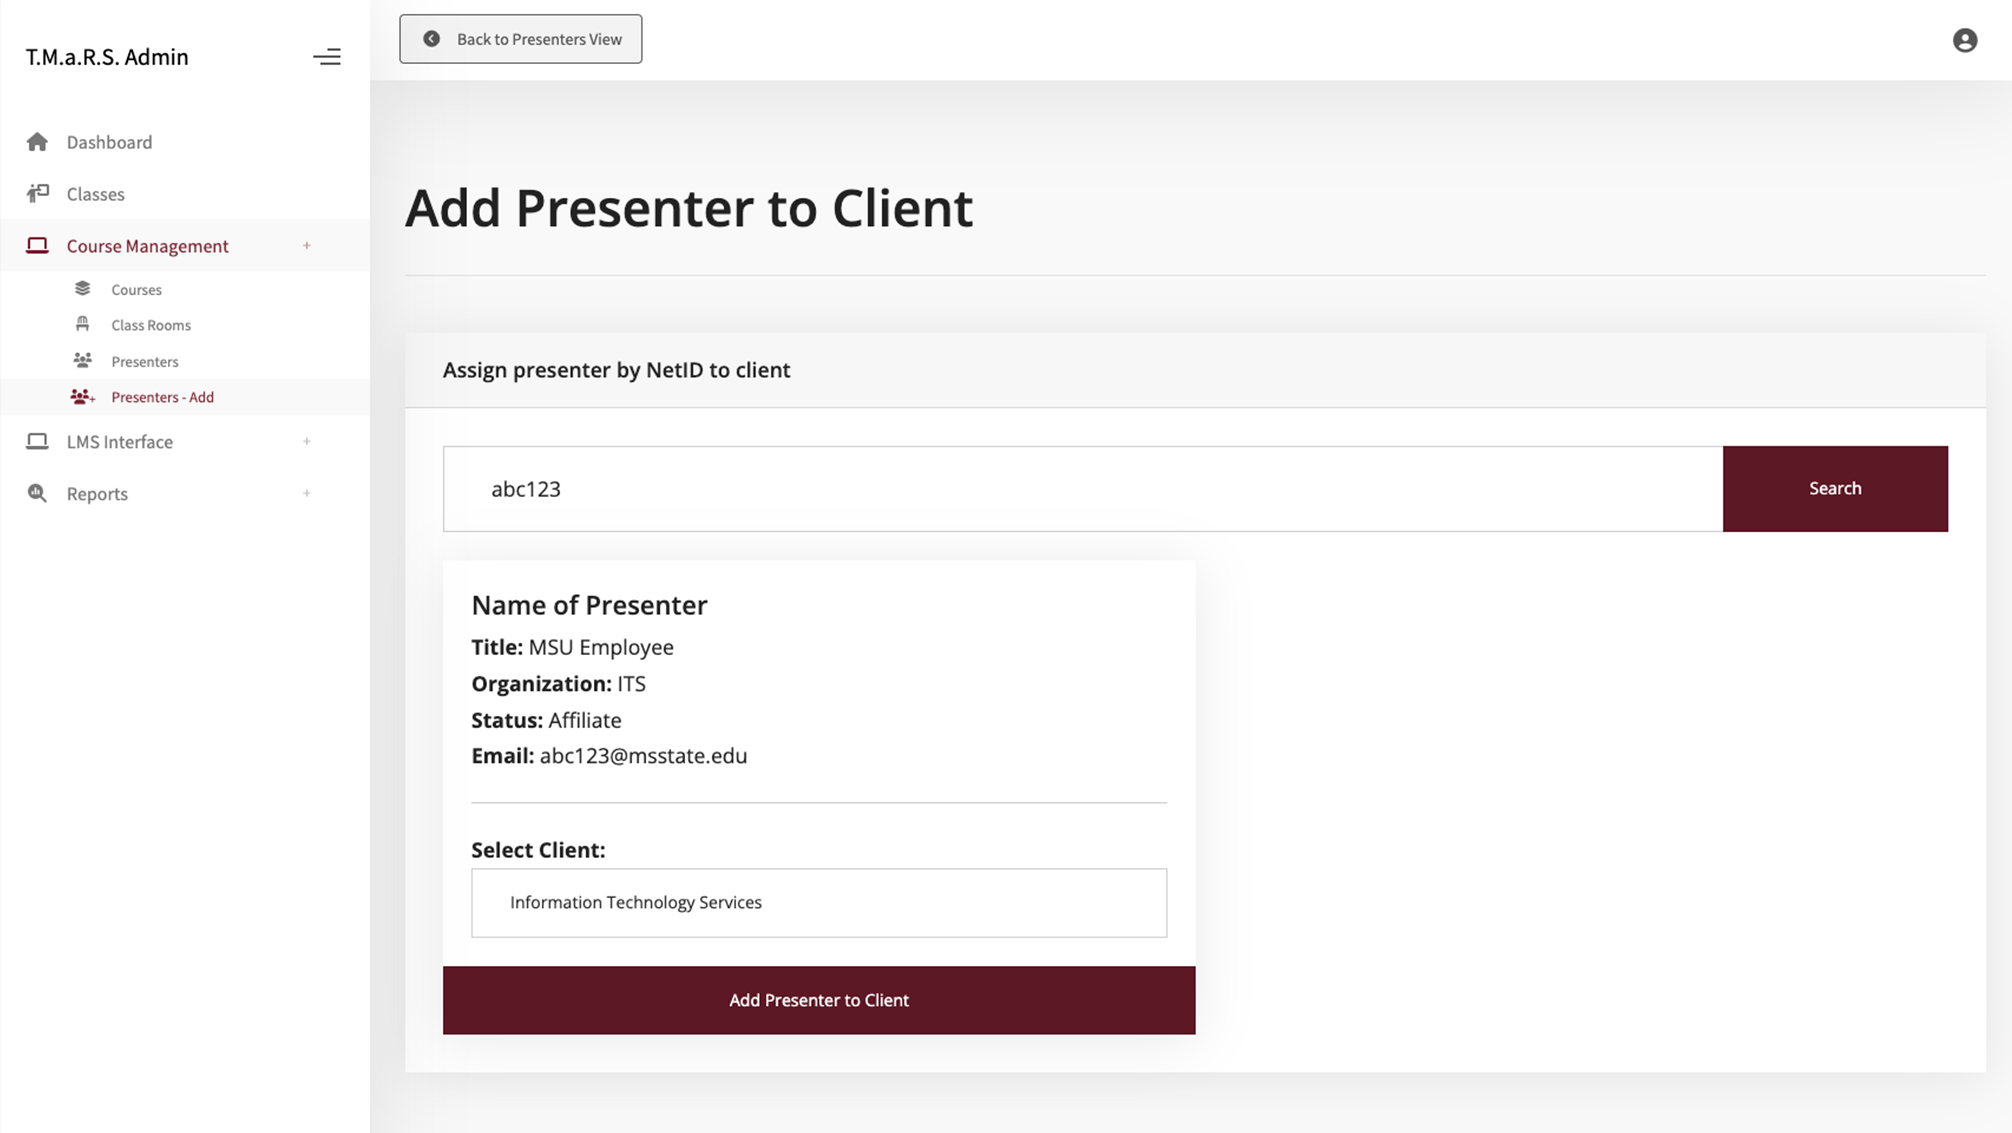
After searching, the system will display the person's information:
Name
Title
Organization/Department
Status (Staff, Faculty, etc.)
Email address
If this is the correct person to add as a presenter:
Verify the client or select the client from the "Select Client" dropdown.
Click the Add Presenter to Client button.
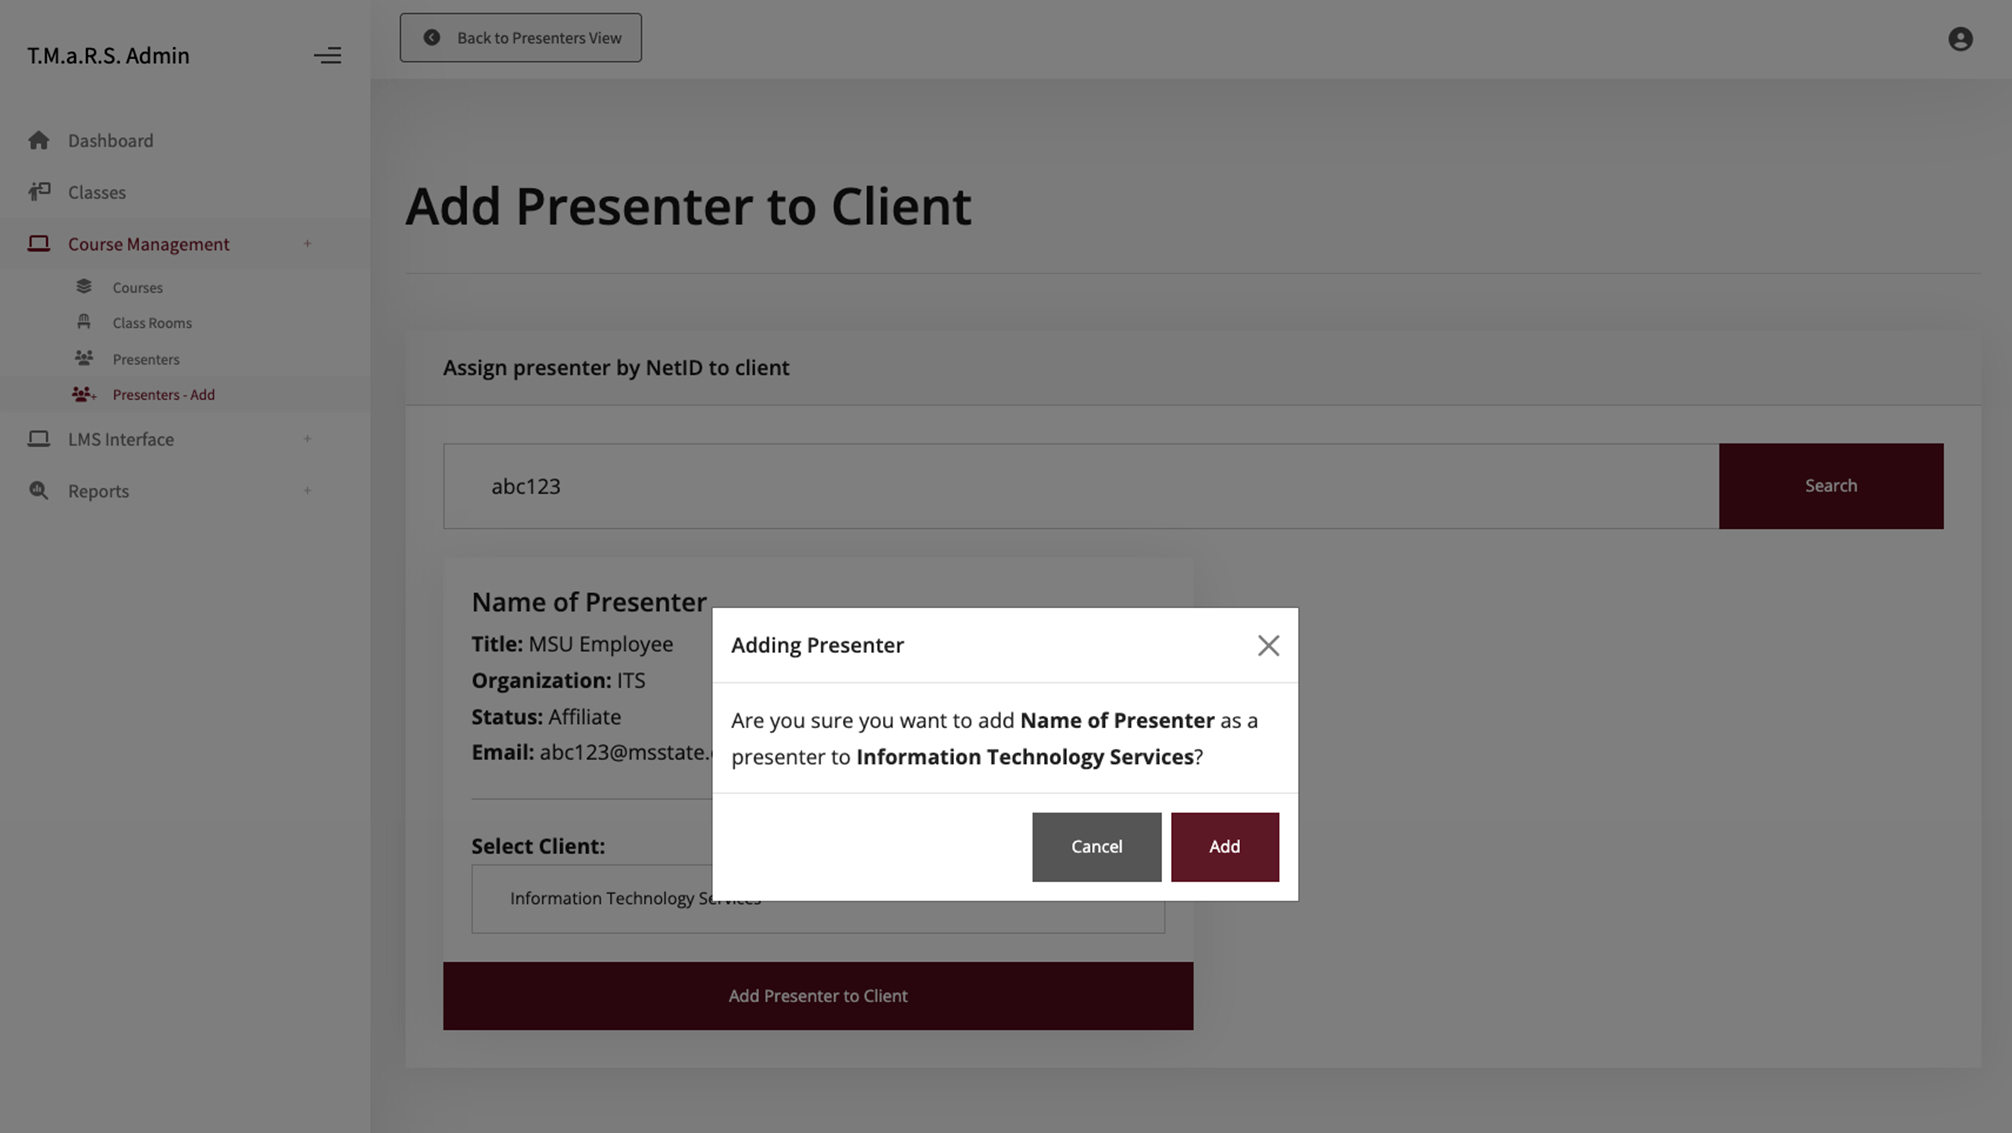
When the Adding Presenter modal appears, click Add to confirm that the presenter is correct for the client listed.
If this is not the correct person or client, click Cancel to search again or select the correct client.
After clicking Add, a success message will appear.
Add another Presenter or click the Back to Presenters View button to return to the Presenters Default Settings page.
Tip: You can't add the same presenter to a client twice. If you try, you'll get an error message. This prevents duplicates in the system.
Adding Non-MSU Presenters
Non-MSU presenters must be created by a system administrator before they can be added as presenters in TMaRS. If you need to add an external instructor and they're not in the "Valid Non MSU Accounts" list, contact your TMaRS administrator to have the account created first.
Removing Presenters
Presenters can be removed from the client list when:
An instructor leaves your department
Someone is no longer teaching training sessions
You accidentally added the wrong person
To remove a presenter from your client list:
Go to Course Management → Presenters.
Locate the presenter in the table.
Click the Remove button.
When the Remove Presenter modal appears, click Remove to confirm removal of the presenter from the client list.
If needed, click Cancel (X) to close the Remove Presenter modal and return to the client list.
After clicking Remove, a success message will appear.
Important: Removing a presenter from your client does NOT delete them from the system or affect classes they have already taught. It only removes them from your client's list of available presenters for future class offerings.
Next Steps
Now that you've set up your classrooms and presenters, you're ready to:
Create Courses - Define what training you'll offer (if not already done)
Schedule Classes - Create specific training sessions with dates, times, locations, and instructors
Manage Enrollments - Track who's registered and attending
See the Managing Classes guide for step-by-step instructions on scheduling your first training session.