Classes are scheduled training sessions based on your courses. Each class has designated start and end dates, specified class times, location, and presenter and/or facilitators.
A class is a specific scheduled instance of a course. While a course defines what will be taught, a class defines when, where, and who will teach it.
Required Attributes
Class View - View classes
Class Admin - Create, edit, and manage classes
Class Add - Create new classes
Class Add Previously Taught - Create classes only for courses you've taught before
Classes vs Courses: Quick Reference
Aspect
Course
Class
What it is
Training template/curriculum
Scheduled training session
Created
Once, reused multiple times
For each session offered
Contains
Title, description, prerequisites, certification info
Date, time, location, instructor, enrollment
Example
"Database Fundamentals"
"Database Fundamentals on Jan 15, 2:00 PM in Room 301 with John Smith"
Where to manage
Course Management → Courses
Classes (top-level menu)
Important: You must have a course created before you can schedule a class. Classes are based on courses. If you need to create a course first, see the Managing Courses Admin Guide.
Viewing the Class List
To view the class list, select the "Classes" item from the navigation menu
OVERVIEW
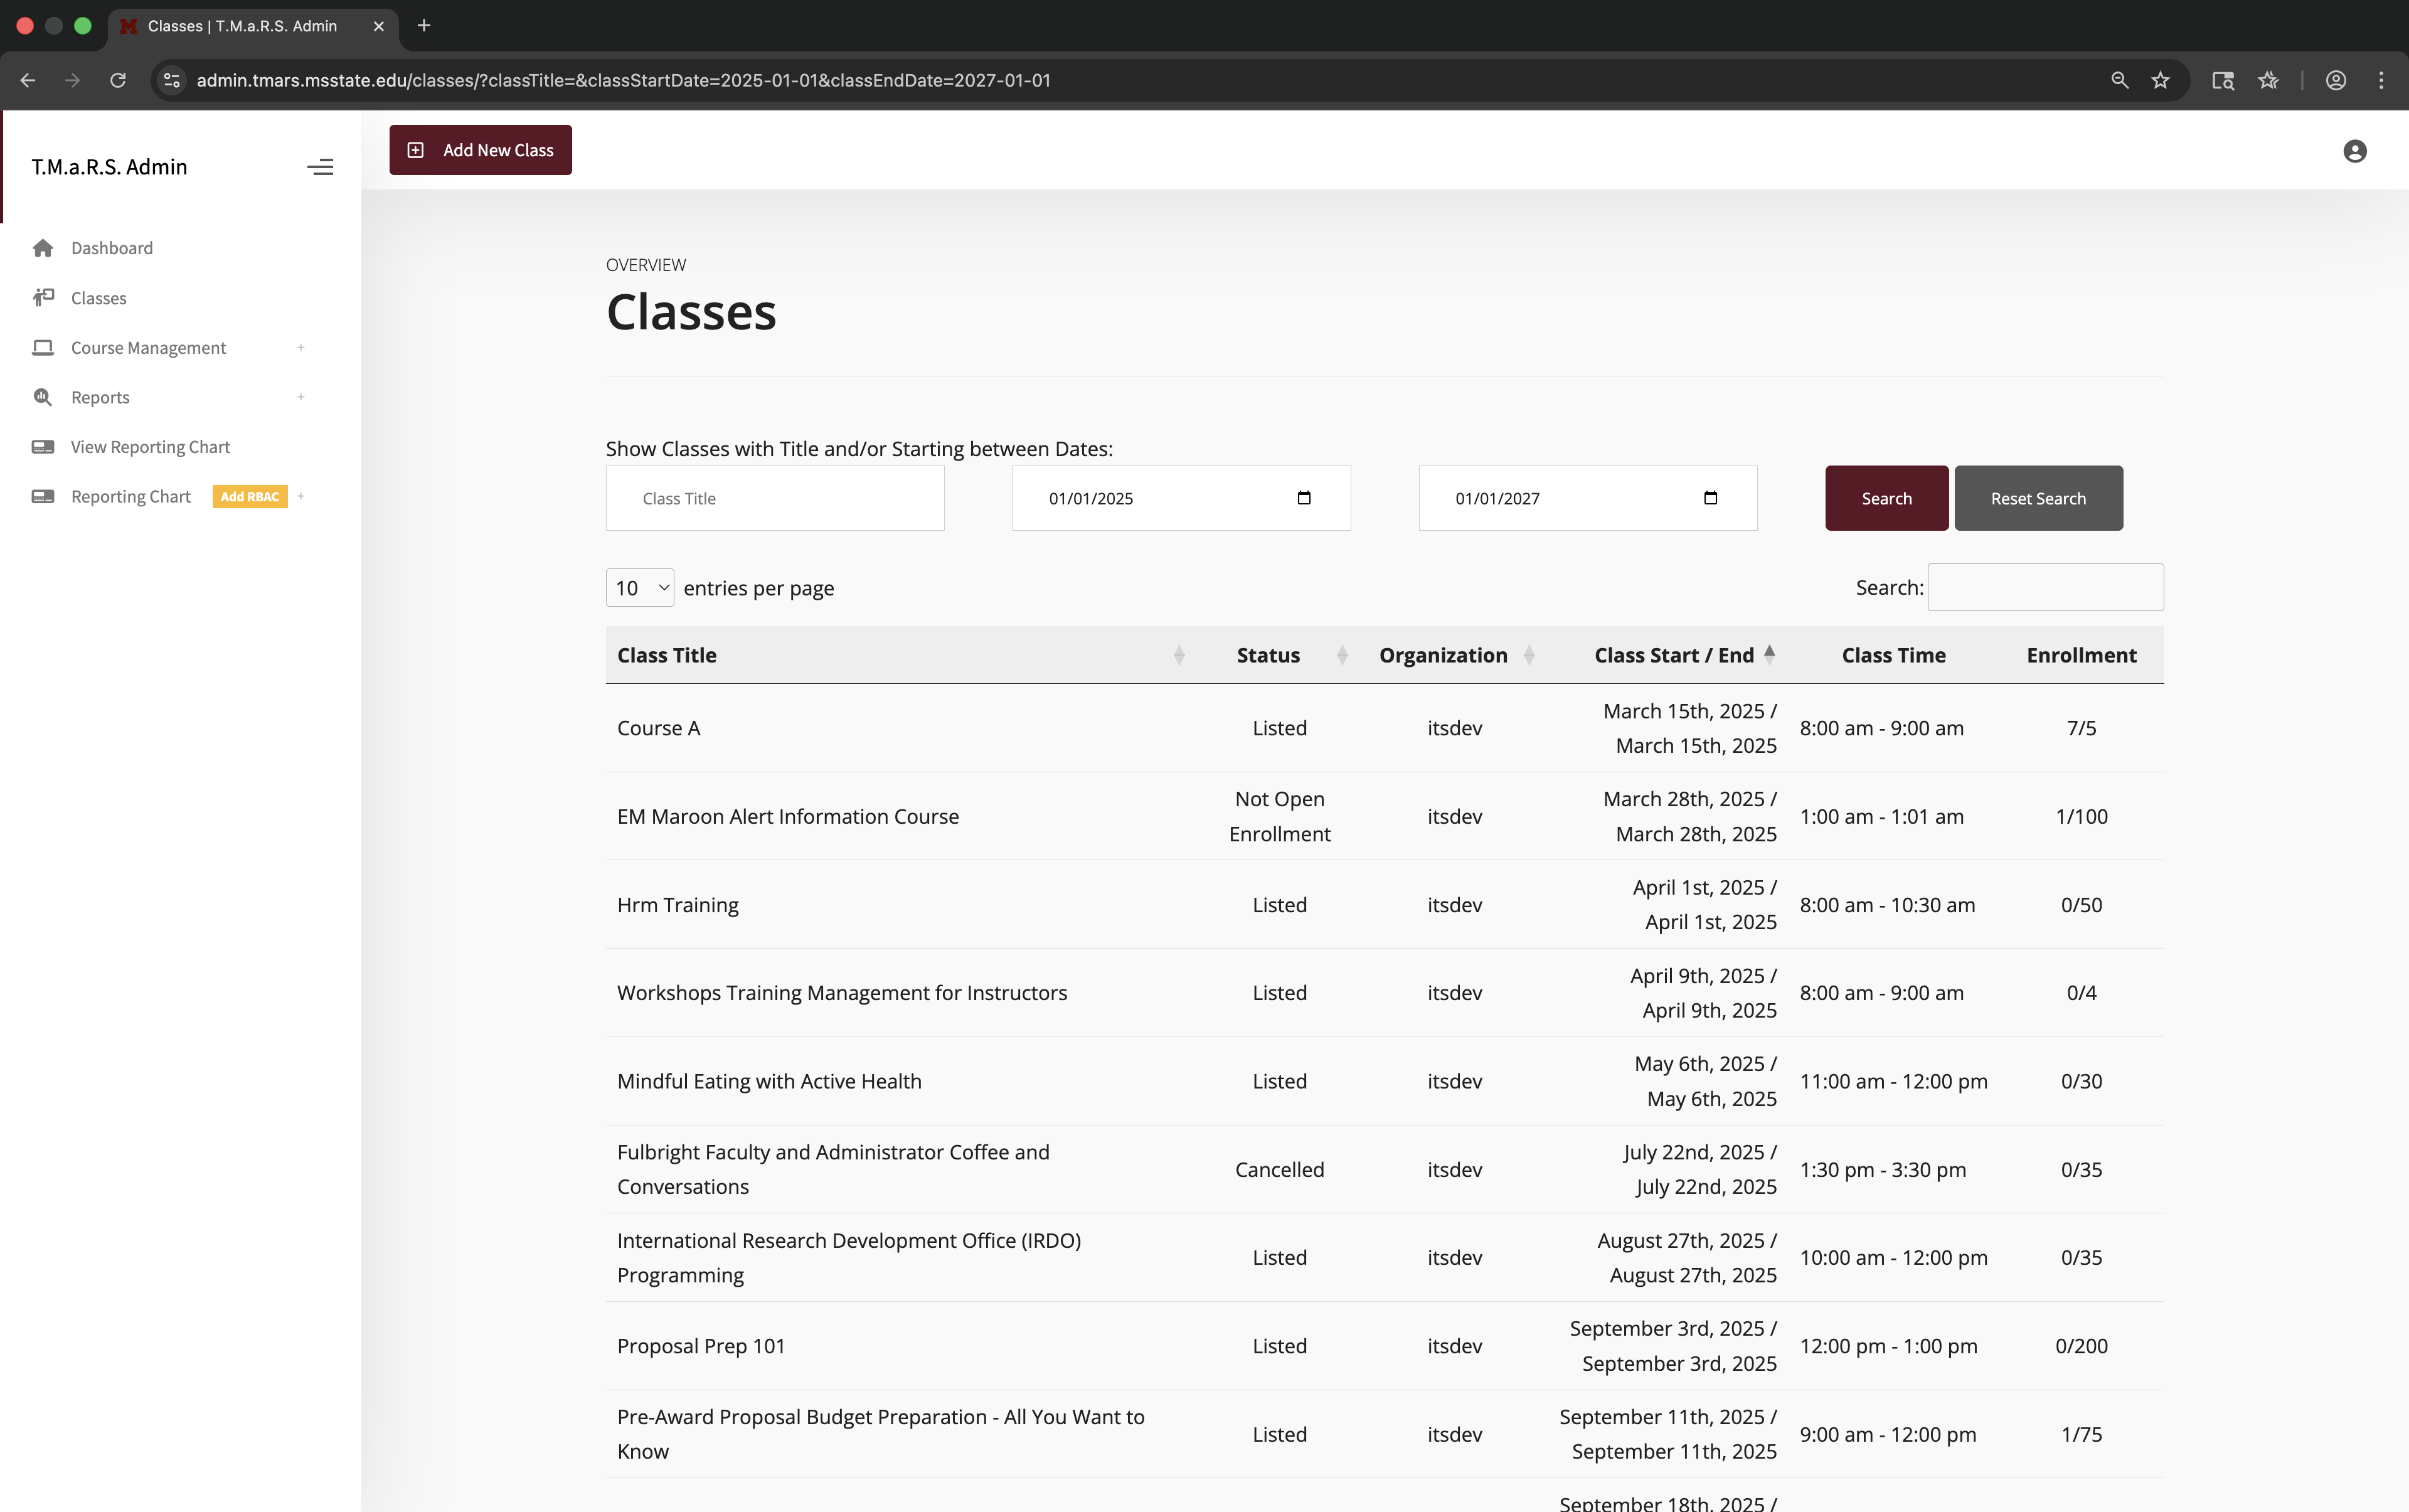
Class List Overview
The Class list displays all active, upcoming and archived classes that are associated with you and your Organization.
If your having trouble finding a specific class on the list, you can use the filter options to low the number of shown classes.
Once you have found whatever class you were looking for, clicking on the class entry will navigate you to.a more detailled synaposis of that class.
Understanding the Classes Table
The classes table displays:
Class Title - The class name for your course
Status - The availability status for the class. For more info, Check the "Class Status and Certification" below
Organization - The client who owns this class
Class Start / End - The Date range for when the class will be taught
Class Time - The start and end times for when the class is in session
Enrollment - The current number of enrolled students as well as the total possible amount of enrollments
Searching and Filtering Classes
If you are looking for specific classes on the list you can filter the result.
You can filter the list via the following:
Class Title - Type part of the course name to filter
Starting between Dates - Set a date range to find classes in that period
Click Reset Search to clear all filters
Once you've set your filter click Search to apply it.
To clear your filters, click Reset Search to show the fill list again.
Tip: The date range filter is especially useful for planning upcoming training or reviewing past sessions. You can leave the class title blank to see all classes within a specific date range.
Creating a New Class
Creating a New Class
Let's schedule a class
To create a new class:
Navigate to Classes in the sidebar
Click the Add New Class button at the top of the page
Select your Client first - this determines which courses and resources you can use
Select the Class Title (course) - only courses from the selected client will appear
Complete all remaining fields
Click Add New Class at the bottom to save
Important: You must select Client and Course before other dropdown options become available.
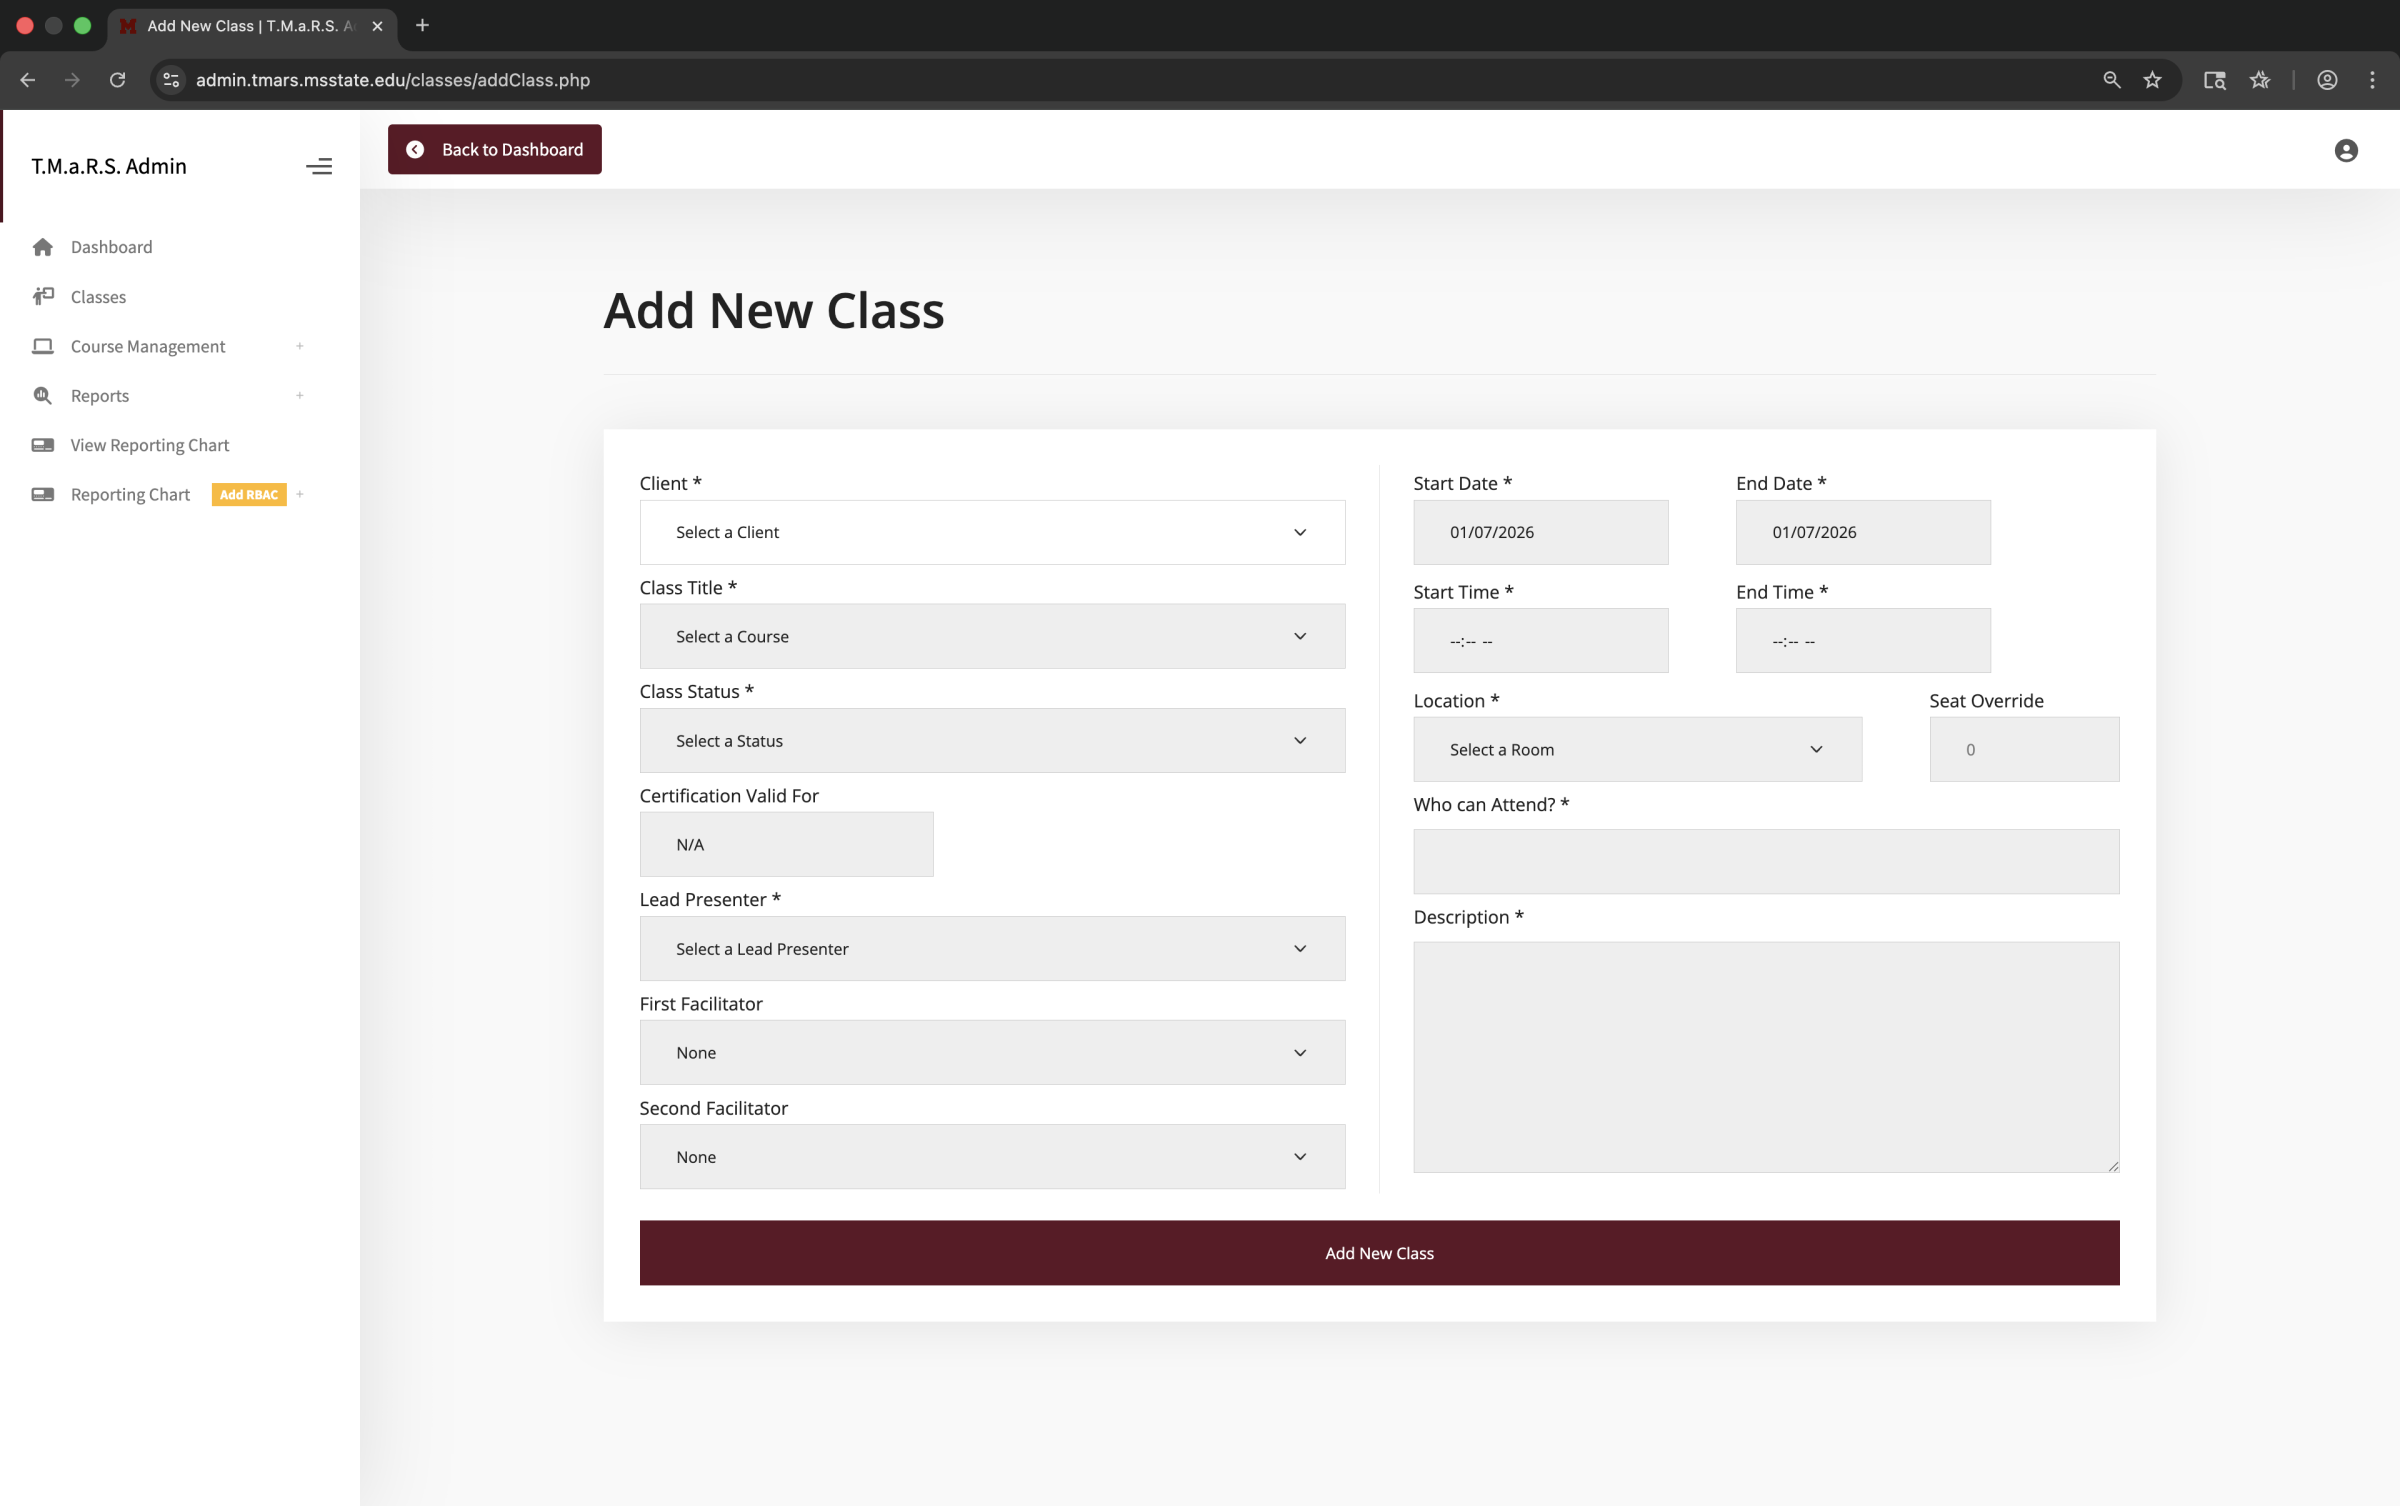
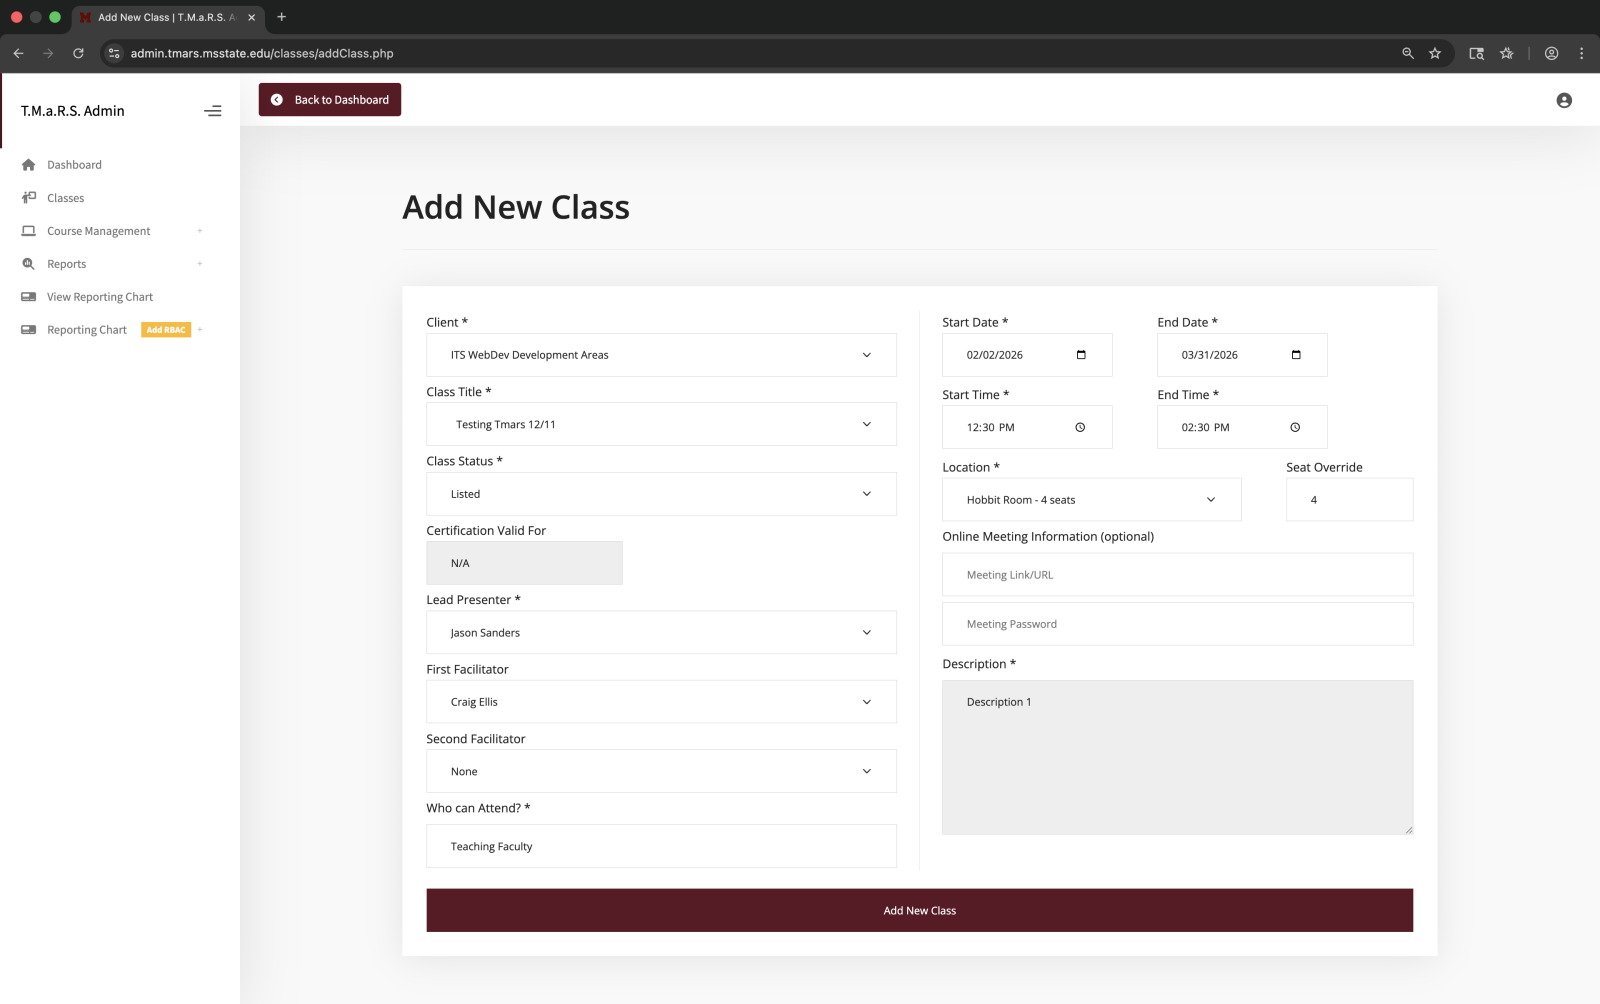
Add New Class Form Example
The Add New Class form has all fields on one page. Here's what a completed form looks like:
Tip: Most fields come pre-filled from the course you selected (like "Who can Attend" and "Description"), but you can edit them for this specific class if needed.
Understanding Class Fields
Understanding Class Fields
Let's go through each field on the Add New Class form and what it does.
Client and Course Selection
Field
Description
Required
Client
Select which organizational client this class belongs to. Must be selected first - this determines which courses, presenters, and rooms you can choose from.
Yes
Class Title
Select the course this class is based on. Only courses from the selected client will appear in the dropdown. The course determines the certification period, description, and other defaults.
Yes
Selection Order Matters!
You must select Client first, then Class Title (course). The other dropdowns (Lead Presenter, Location, Facilitators) won't populate until you've made these selections because they're filtered by your client.
Class Status and Certification
Field
Description
Required
Class Status
Controls class visibility and enrollment. Options:
Listed - Class is visible and open for enrollment
Tentative / Waiting to List (Hidden) - Planning stage, not visible to users
Cancelled - Class is cancelled, enrolled users are notified
Not for Open Enrollment (Hidden to Non-Enrolled) - Private class, only visible to enrolled participants
Yes
Certification Valid For
Pulled from the course automatically. Shows how long the certification lasts (e.g., N/A, 12 months, 24 months). Cannot be changed at the class level.
Auto-filled
Instructors and Facilitators
Field
Description
Required
Lead Presenter
The primary instructor for this class. Select from presenters that have been added to your client. This person appears on class communications and is responsible for the session.
Yes
First Facilitator
Optional additional instructor or teaching assistant. Select "None" if not needed.
No
Second Facilitator
Optional second additional instructor or teaching assistant. Select "None" if not needed.
No
Tip: If you don't see the instructor you need in the dropdown, you'll need to add them as a Presenter first. Go to Course Management → Presenters to add new instructors before creating your class.
Schedule and Location
Field
Description
Required
Start Date
The date the class begins. Use the date picker to select. Cannot be set before the current date.
Yes
End Date
The date the class ends. For single-day classes, set the same as Start Date. Must be the same day or after Start Date.
Yes
Start Time
When the class begins (e.g., 9:00 AM). Use the time picker.
Yes
End Time
When the class ends (e.g., 12:00 PM). Must be after Start Time.
Yes
Location
Select the room where training will be held. Only rooms added to your client will appear.
Yes
Seat Override
Manually set class capacity to override the room's default capacity. Enter "0" to use the room's default value. You can set this higher than room capacity if needed (e.g., for overflow or online participants).
No
About Seat Override
Seat Override is useful when:
You want to limit enrollment below room capacity (e.g., room holds 30 but you only want 15 for hands-on training)
You expect some online participants in addition to in-person (e.g., room holds 20, set to 30 for 20 in-person + 10 online)
You want to use the room's default - just leave it at "0"
Tip: If you don't see the location you need, go to Course Management → Class Rooms to add it before creating your class.
Online Meeting Information
Field
Description
Required
Meeting Link/URL
If this is an online or hybrid class, enter the Zoom, Teams, or webinar link here. This will be included in enrollment confirmations and reminders.
No
Meeting Password
If the online meeting requires a password, enter it here. It will be shared with enrolled participants.
No
Audience and Description
Field
Description
Required
Who can Attend?
Target audience for this class. Pre-filled from the course but you can edit it for this specific session if needed. Example: "IT staff and data analysts needing database skills"
Yes
Description
Class description. Pre-filled from the course but you can customize it for this specific session. This appears to users browsing the class catalog.
Yes
Tip: The "Who can Attend" and "Description" fields are inherited from the course you selected, so you don't have to retype everything. Only edit them if this particular session has unique requirements or details.
Saving Your Class
Once you've completed all required fields:
Review your entries for accuracy - especially dates and times!
Click the Add New Class button at the bottom
You'll be redirected to the Classes overview page
Your new class will appear in the table
What Happens After You Create a Class?
Once saved:
The class becomes visible in the catalog (if status is "Listed")
Users can browse and enroll
The system tracks enrollment against your capacity
You can manage enrollments, send emails, and edit class details
Managing Classes After Creation
After creating a class, you have several management options. Let's explore what you can do with an existing class.
Viewing Class Details
To view a class:
Go to Classes in the sidebar
Find your class in the table and select it
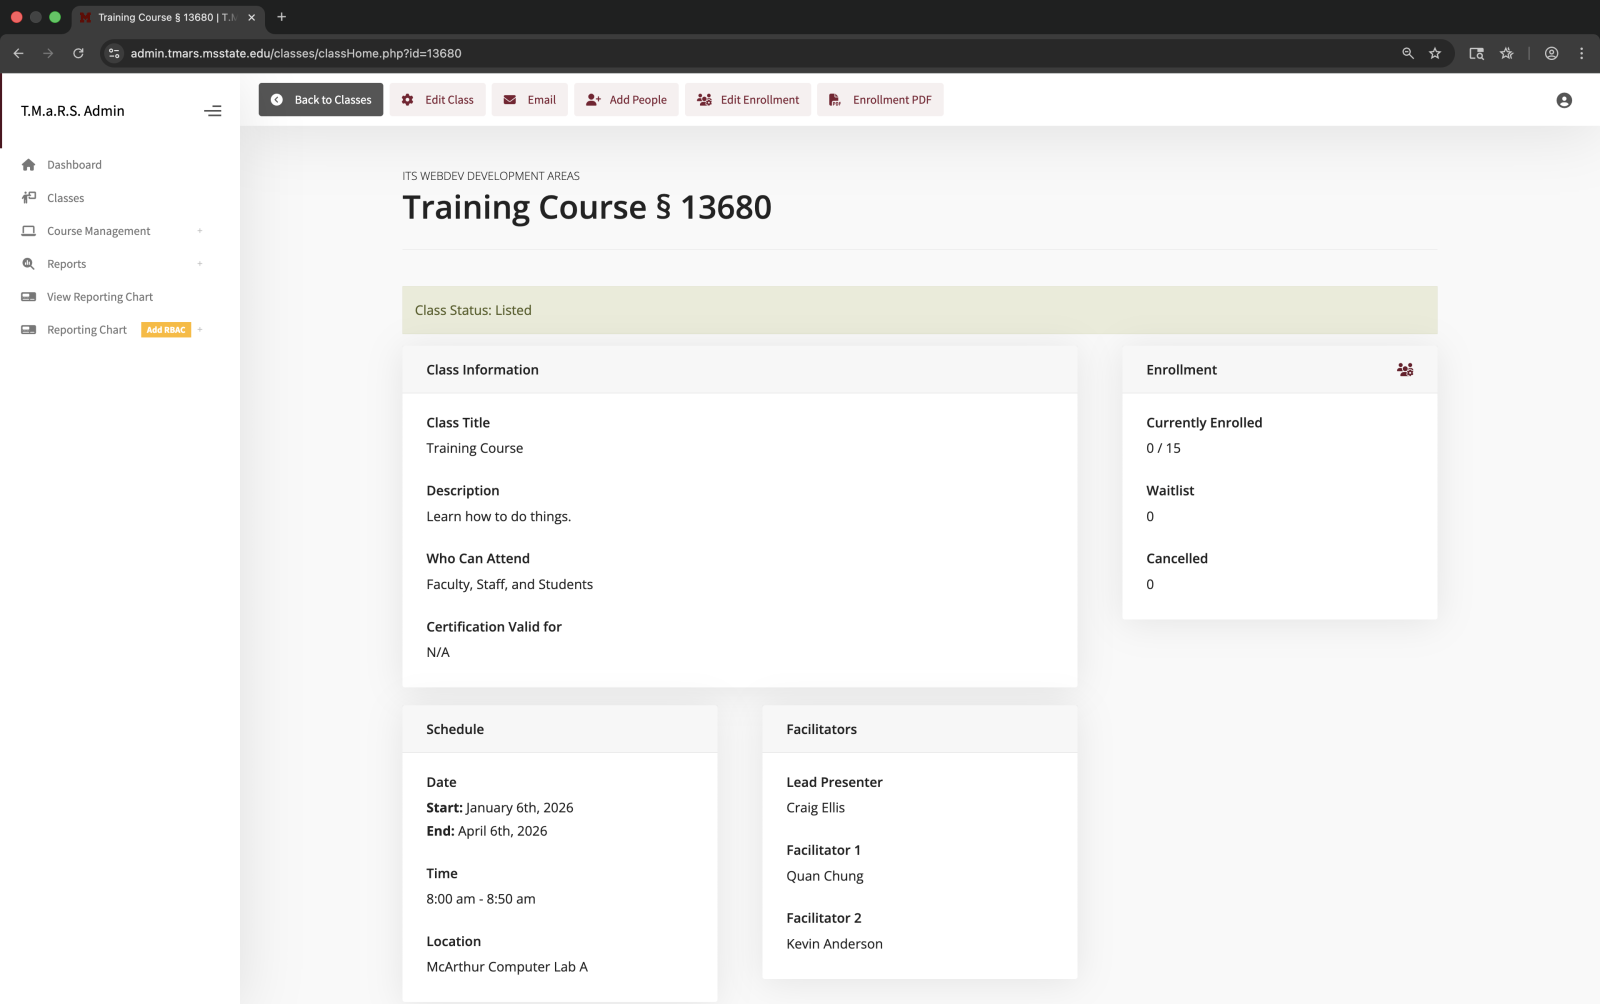
The individual class page shows:
Class Information - Title, description, audience, certification period
Schedule - Date, time, location
Facilitators - Lead presenter and facilitators
Enrollment - Current enrollment count, waitlist, cancelled
You'll see the same form you used to create the class
Make your changes
Click Update Class to save
Tip: You can edit any field on a class including dates, times, location, instructors, and status. Be aware that enrolled participants may have already received confirmation emails with the old information.
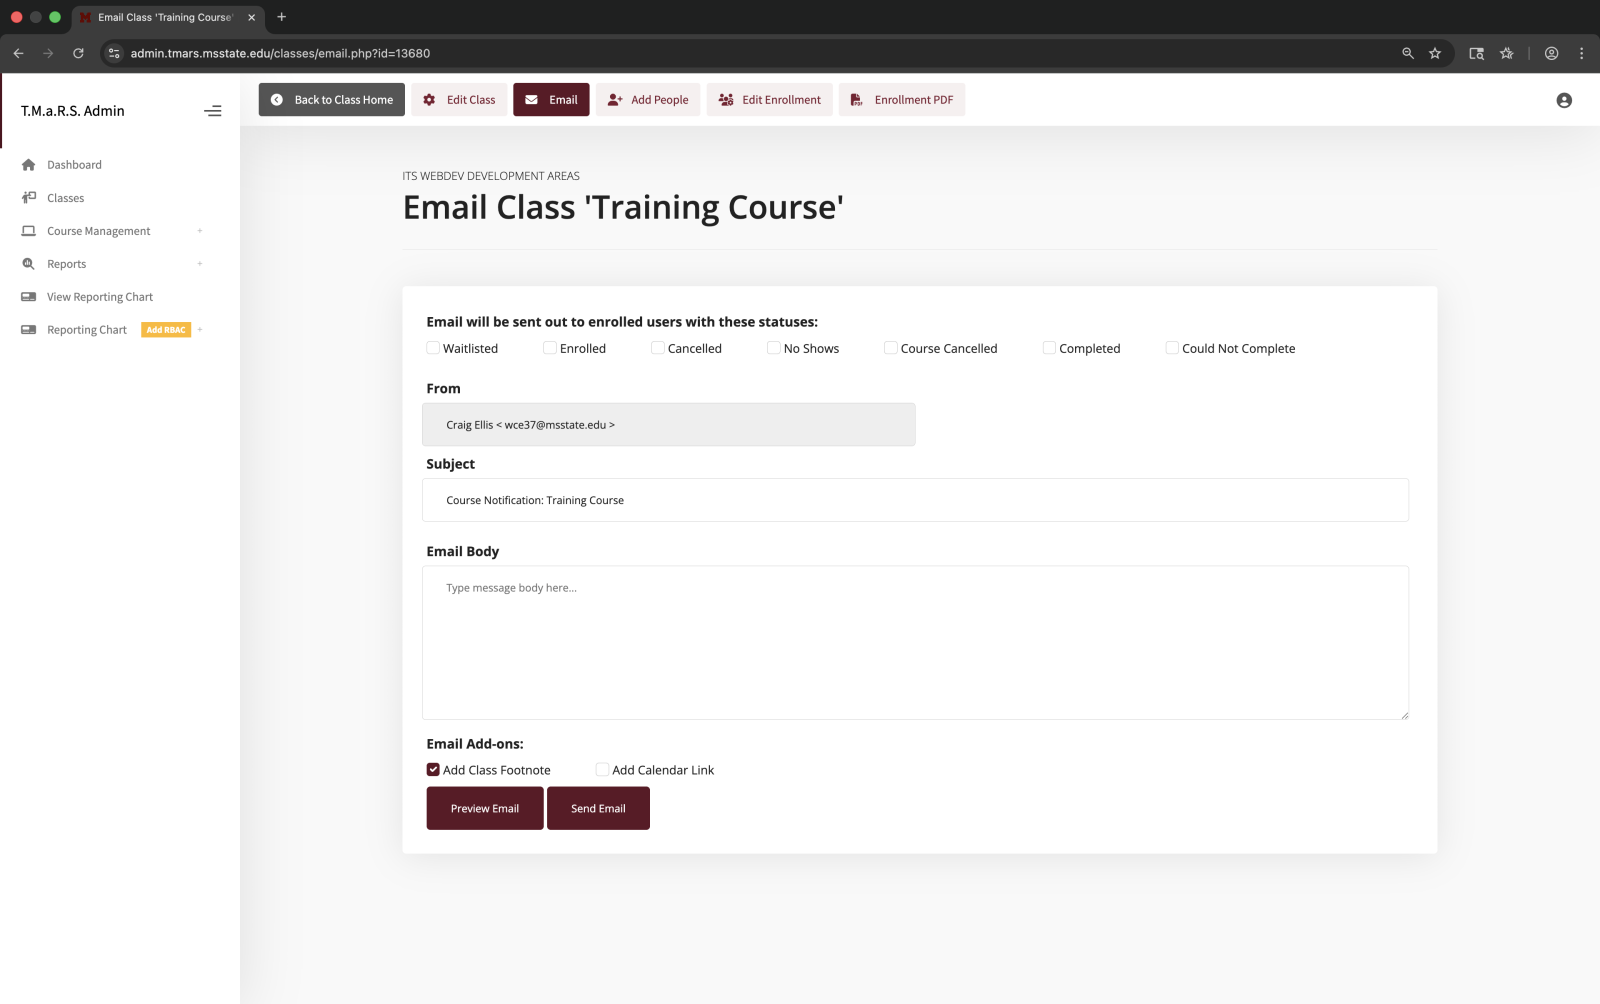
Emailing Class Participants
To send an email to enrolled participants from the class summary page:
Click the Email button at the top
Select which enrollment statuses to email (Enrolled, Waitlisted, Cancelled, etc.)
Compose your message
Click Preview Email to review or Send Email to send
Emails sent from this page may take up to 10 minutes to be delivered.
Email features:
Status Filtering - Choose which enrollment statuses receive the email
From Address - Automatically set to your email
Subject - Pre-filled with class title, editable
Email Body - Compose your message
Add-ons - Include class details footer and/or calendar link
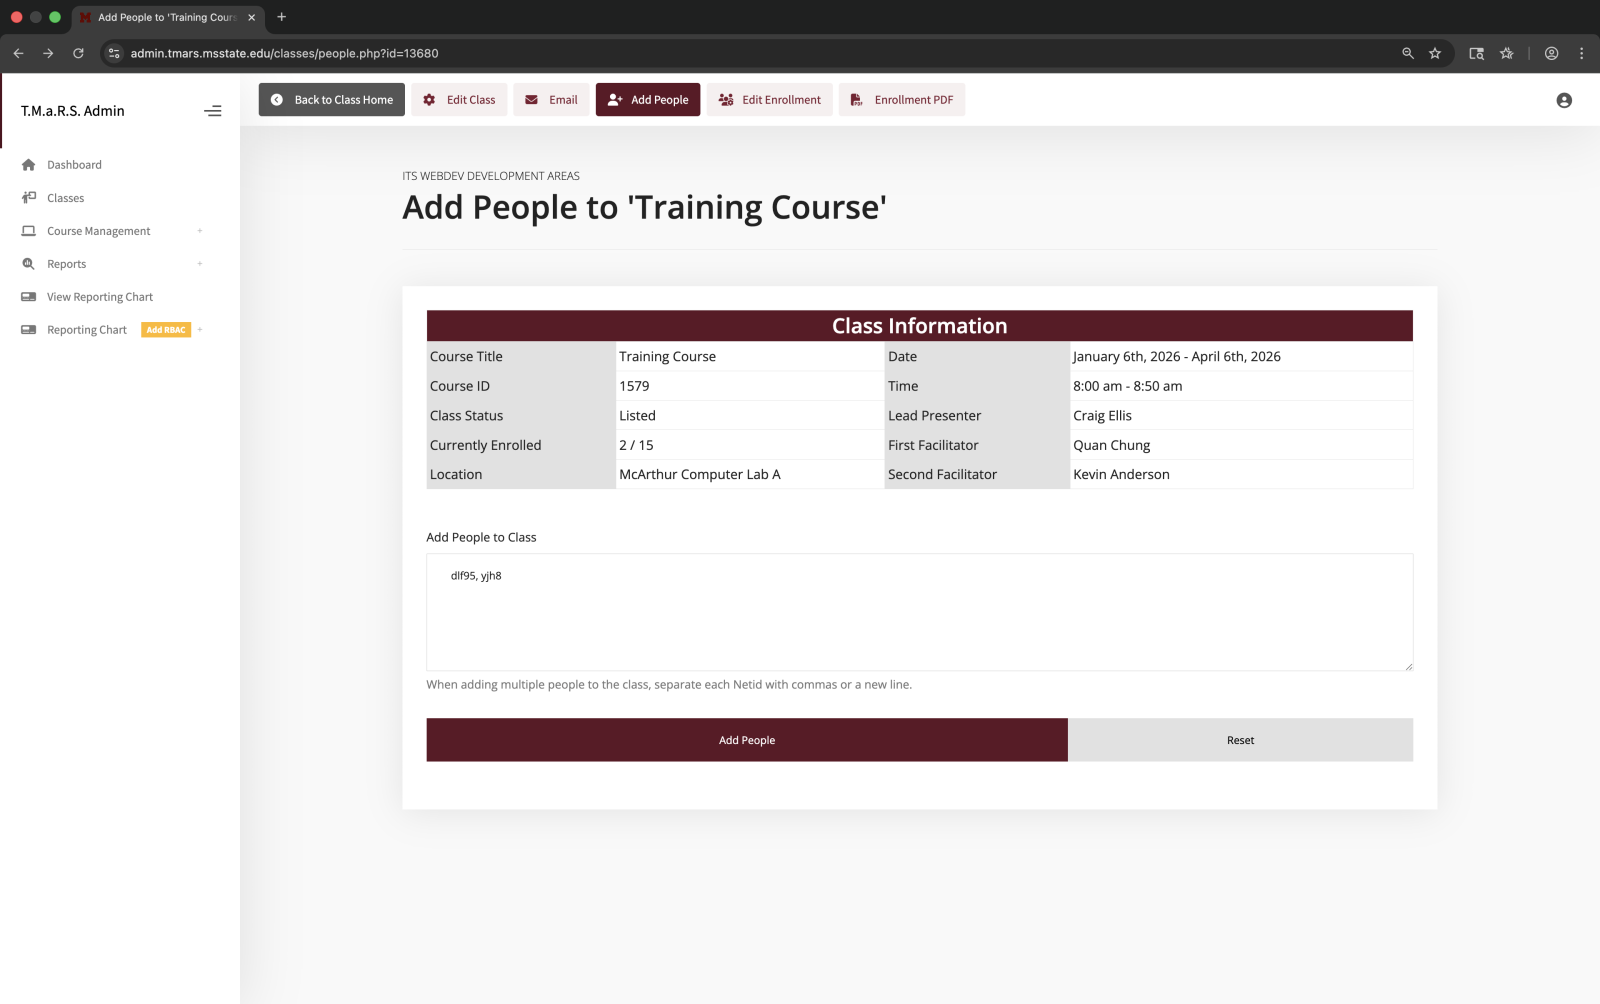
Adding People to a Class
To manually enroll people from the class summary page:
Click the Add People button at the top
Enter NetIDs (one per line or comma-separated)
Click Add People
When adding people:
Enter NetIDs only (not email addresses or names)
Separate multiple NetIDs with commas or new lines
The system validates that each person exists in the directory
Enrolled people receive confirmation emails automatically
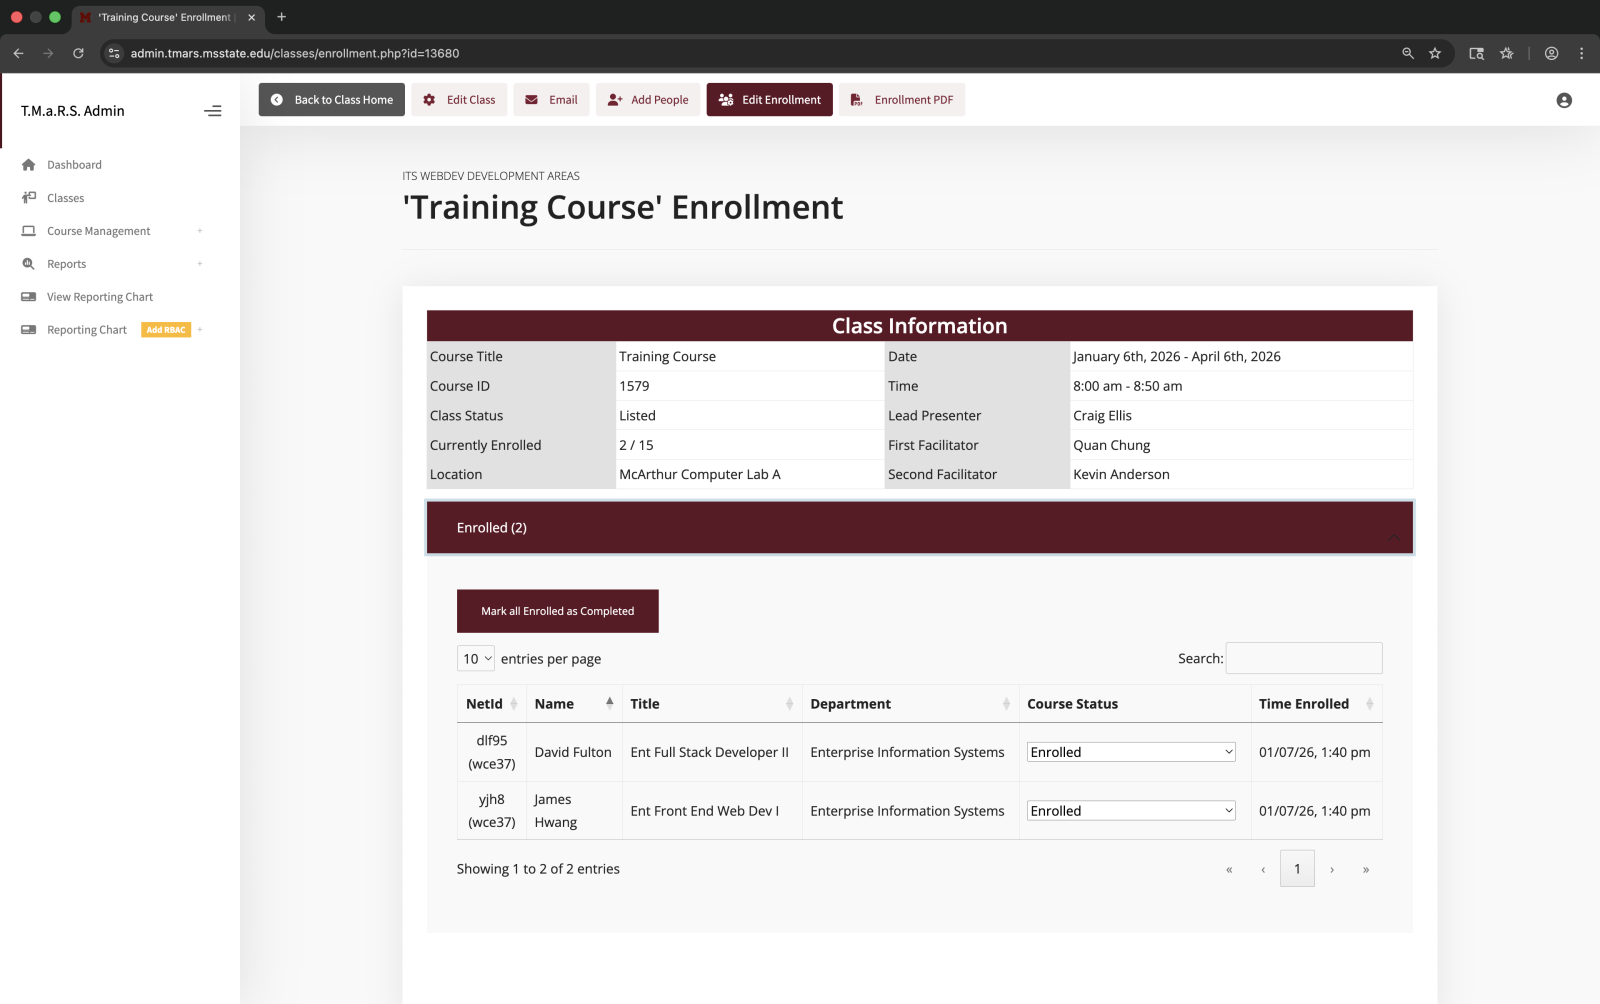
Managing Enrollment
To manage who's enrolled and their status:
Click the Edit Enrollment button at the top
You'll see enrollment grouped by status
Expand each status group to see enrolled individuals
Use the dropdown next to each person's name to change their status
Enrollment status options:
Enrolled - Confirmed participant
Waitlisted - On waiting list (if class is full)
Cancelled - Cancelled by admin or user
No Show - Did not attend (mark after class)
Completed - Successfully completed (mark after class)
Could Not Complete - Attended but did not pass/complete requirements
After the Class
Use the Edit Enrollment page to mark attendance after the class is complete. Change enrolled participants to either Completed (successfully attended) or No Show (did not attend). This is how you track who actually received the training.
Enrollment PDF and Printing
To generate printable enrollment lists:
Enrollment PDF button (from the class summary view) - Generates a PDF of all enrolled participants organized by status
These PDFs are useful for:
Printing sign-in sheets
Sharing enrollment lists with instructors
Keeping paper records
Compliance documentation
Class Status Options
The class status helps you control visibility and enrollment for your training sessions.
Listed
Class is visible in the training catalog
Users can browse and enroll
Standard status for active classes
Use this when your class is ready for registration
Tentative / Waiting to List (Hidden)
Class exists in the system but is hidden from users
Not visible in the catalog
No one can enroll
Use this for planning or when waiting for instructor/room confirmation
Change to "Listed" when ready to open enrollment
Cancelled
Class is cancelled
Already enrolled participants are notified
No longer visible in the catalog
Use this when you need to cancel a scheduled class
Enrollment records are preserved for reporting
Not for Open Enrollment (Hidden to Non-Enrolled)
Private class
Not visible in the public catalog
Only visible to people already enrolled
Use this for invitation-only or confidential training
You must manually add participants using the "Add People" feature
Best Practices
Use Tentative status when scheduling classes in advance. You can create multiple classes and keep them hidden until you're ready to open enrollment.
Use Not for Open Enrollment for specialized training where you want to control exactly who attends (executive training, sensitive topics, limited pilot programs).
Next Steps
Now that you know how to create and manage classes, you can:
Set Up Class Rooms - Add training locations to your client (if not already done)
Add Presenters - Add instructors who will teach (if not already done)
Manage Enrollments - Review who's registered, add people, mark attendance
Send Communications - Email participants with updates and reminders
Run Reports - Generate attendance and completion reports
See the related guides for step-by-step instructions on these topics.